Tuesday, June 30, 2009

MILLIE'S MANDEL BREAD

I, once again, made a batch (or 20) of my great grandmother's mandel bread that could seriously feed a family of 40.  The guys who work in my car garage, my boyfriends parents, my parents, my dry cleaner, veterinarians office, and my doctors are a few of the recipients who benefited; and I still have some to spare.

Half of the 1 zillion mandel had chopped Scharfenberger dark chocolate and the other 1 zillion had dried cranberries, dried pineapple chunks, raisins, and almonds.

Sweet.


MORE BREAD BAKING

A little update of what has been going on in school the past week...Oh, and bread baking seriously rules.

Sour Dough Bread


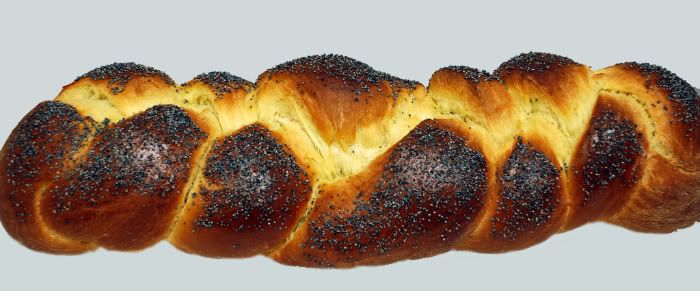
Challah Bread--which went from this...

....to this....


...to this (Challah French toast for breakfast!)


Challah & Heineken


Tuesday, June 23, 2009

ICE 11: VANILLA BEAN BLUEBERRY COCONUT CUPCAKES W/ VANILLA BEAN BUTTERCREAM

Ahhh, at it again! Iron Cupcake Earth: Summer Berries..how fitting!  Of all the summer berries out there, I went with blueberries because they truly are my most favorite berry of all.  Price club had the most beautiful blueberries this weekend, so I picked myself up a ginormous container of 'em.  I made a vanilla bean cupcake studded with plump, juicy blueberries and coconut throughout.  The cupcake was then topped with a dollop of vanilla bean buttercream, coconut flakes, and gummy berries.  

These were refreshing, light, and super moist.  I purposely made a buttercream that was more like a Swiss meringue than an overly sweet crusty child-like buttercream which proved to be the perfect compliment to the cake.  Blueberry and coconut are a spectacular flavor combination that I would pretty much add to anything sweet-toothed. 


Be sure to vote for me between June 28th and July 6th at No One Puts Cupcake in a Corner

Vanilla Bean Blueberry Coconut Cupcakes:

1 1/2 cups all-purpose flour

1 teaspoon baking powder

1/2 teaspoon salt

1/2 cup (1 stick) unsalted butter, softened

1 cup sugar

2 large eggs, room temperature

3/4 cup milk

1 vanilla bean, scraped

1 c. blueberries

Procedure
1. Preheat oven to 350 degrees. Line 2 muffin tins with cupcake papers.

2. Sift the flour, baking powder, and salt into a medium bowl. Set aside.

3. In the bowl of an electric mixer, cream the butter and sugar on medium speed until fluffy, 2 to 3 minutes. Add the eggs one at a time, beating until well incorporated. Add the dry ingredients in two parts, alternating with the milk. Add the vanilla. Fold in blueberries.

4. Spoon the batter into the prepared cups until each is about two-thirds full. Bake 20 to 22 minutes or until the tops spring back when lightly touched. Let cupcakes cool in pans for 10 minutes. Remove from pans, and allow to cool completely on a wire rack.

5. When cupcakes are thoroughly cool, top with buttercream and coconut.


June ETSY PRIZE-PACK is from artists:
Last and certainly not least, don’t forget our corporate prize providers: HEAD CHEFS by FIESTA PRODUCTS,http://www.fiestaproducts.com, HELLO CUPCAKE by Karen Tack and Alan Richardson, http://blog.hellocupcakebook.com, JESSIE STEELE APRONS http://www.jessiesteele.com; TASTE OF HOME books, http://www.tasteofhome.com; a t-shirt from UPWITHCUPCAKES.COM http://www.upwithcupcakes.com/. Iron Cupcake:Earth is sponsored in part by 1-800-Flowers,http://www.1800flowers.com . 


HOMEMADE PEANUT BUTTER TWIX

Ugh, HOW GOOD ARE TWIX? I swear, I blame Ferris Bueller for my Twix addiction. Sure, he's a fictional character that I idolized growing up who mastered the concept of playing hookie, but this movie shared the same theme song as the Twix commercials back in the late 80's, early 90's. That being said, I must have seen Ferris Bueller's Day Off over 7 million times; and each and every time I've seen it, I've eaten a Twix. Yes, that's a lot of Twix.

Sugar cookie base, peanut butter caramel layer, topped off by a smooth chocolate ganache. 
I love you, Ferris.

You can use Betty Crocker's version of this recipe here.
However, I made the sugar cookie base, peanut butter caramel filling, and chocolate ganache from scratch. Feel free to use your favorite recipes for each layer!


COCONUT CREAM CHEESE COOKIES

Oh man, these were good. Cream cheese is such a fantastic catalyst for flavor in cookies. You can pair cream cheese with just about anything! It's creamy, delicious, and beyond amazing when paired with coconut. I added pecans to half the batch for an extra crunch. Verdict? Score 1 for me.

*spoiler alert* these cookies require 2 days to make

Coconut Cream Cheese Cookies 
(recipe from Cooks Illustrated) 

2 cups plus 3 Tbsp all-purpose flour 
1/2 tsp baking soda 
1/2 tsp salt 
12 Tbsp (1 1/2 sticks) unsalted butter, melted & cooled until room temp 
5-6 oz. cream cheese softened (I used 8 oz) 
1 cup brown sugar, packed 
1/2 cup granulated sugar 
2 tsp vanilla extract 
2 cups coconut toasted (I used 2 & 1/2 cups) 

Adjust oven racks to upper & lower -middle positions & heat oven to 325. Line a large rimmed baking sheet with parchment paper. Spread coconut evenly on baking sheet.  Once oven is preheated place coconut in oven. Bake for 10-20 minutes stirring every 5minutes for even toasting. Remove from oven when light brown. Do NOT burn. Remove from oven. Allow to cool completely before adding to dough. Re-line cookie sheets with parchment paper. 
Whisk dry ingredients together; set aside. With electric mixer, or by hand mix butter and cream cheese together with a mixer until smooth. Add sugars and beat until thoroughly combined. Beat in vanilla until combined.  Add dry ingredients & beat at low speed just until combined. Stir in cooled coconut. Chill dough overnight. When ready to bake cookies preheat oven to 350 degrees. Drop dough onto parchment lined baking sheets and bake for 12-14 minutes or until edges are set and bottoms are light brown. Do NOT over bake! Cool cookies on sheets until able to lift without breaking and place on wire rack to cool. 

BREAD WINNER

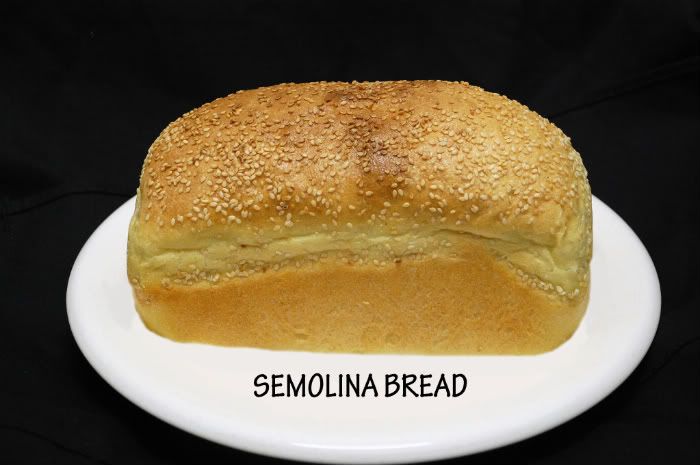
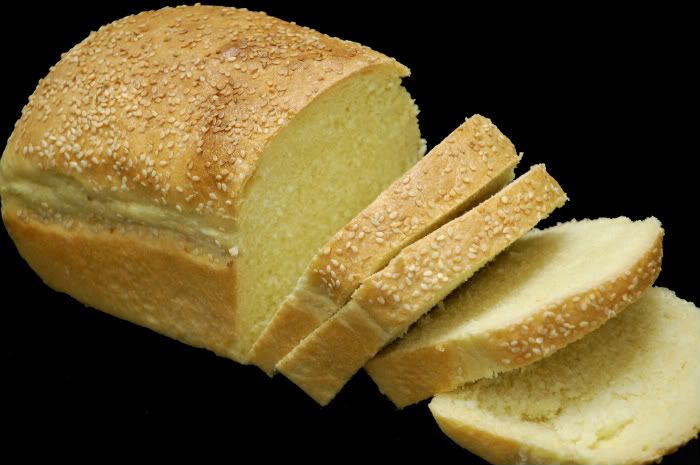
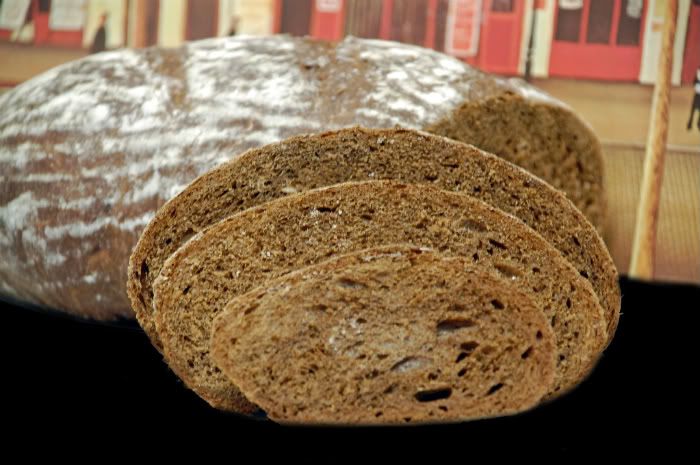
Well hellooooooo (in my best Seinfeld rendition)! Remember me? I am deeply sorry for being MIA the last-oh, I don't know-month or so.  Culinary school has really kept me busy and I just haven't had the time to post what's been going on.  My plan is to keep ya'll updated on what I've been doing/learning/baking in school.  So I vow, from here on out, to keep you afloat. With that said,  I officially completed the first module of the program with flying colors (100% on my final practical, what, what!). Module 2 consists of breads and pastries, yippie!  Finally a topic I have zero experience in thus piquing my interest that much more.  I began this module yesterday and so far I've made Semolina bread, American black bread, and Fougasse.  For all you bread baking virgins, I encourage you to familiarize yourself with the world of CARBOHYDRATES! Bread baking is AWESOME. I find it to be extremely interesting and mind blowing with what a few simple ingredients can do. Here's what I've been up to...


American Black Bread


Fougasse (w/Bacon)

Monday, June 15, 2009

PEANUT BRITTLE

I LOVE PEANUT BRITTLE.

......that's all for today. 
Thank you.

Peanut Brittle from Food Network

Ingredients 

  • 1/2 cup water
  • 2 cups sugar
  • 1/4 teaspoon cream of tartar
  • 1 cup light corn syrup
  • 2 teaspoons ground cinnamon (I omitted)
  • 2 tablespoons unsalted butter
  • 2 cups roasted salted peanuts
  • 1 teaspoon baking soda

Directions

Combine the water, sugar, cream of tartar and corn syrup in a medium-size heavy saucepan fitted with a candy thermometer. Bring to a boil over medium heat. After it boils, stir the mixture occasionally. Boil the mixture until it reaches 340 degrees F. The color should be deep golden brown. Remove from the heat and, working quickly, stir in the cinnamon with a wooden spoon. Stir in the butter until melted, then the peanuts and baking soda.

Pour the mixture onto the oiled cookie sheet with sides and spread it out a bit with the back of a wooden spoon, to about 1/4-inch thickness (it may not fill the whole pan). Let harden, uncovered, in a cool place, 30 to 45 minutes. (To wash the saucepan, soak it overnight.)

Using your hands, and wearing cotton or plastic gloves if desired to keep off any fingerprints, break the brittle into pieces. Store in an airtight container.

TWD:HONEY PEACH CHIP ICE CREAM

Word Association. Words I like to pair with ice cream: chocolate, peanut butter, peanuts, almonds, raisins, marshmallow, caramel, fudge, coconut, butterfinger, snickers, cookie dough, heath bar, sprinkles, oreos, brownie chunks, butterscotch, chocolate chips. M&M's, chocolate crunchies, granola, white chocolate chips, and whipped cream.

Words I don't like to pair with ice cream: peaches and honey.
Catch my drift?

I know, I know, I sound awfully negative about this whole fruit/ice cream pairing, but come on people! Ice cream is made of heavy cream, whole milk, and egg yolks! Why on Earth would I ever pair that with fruit if I'm going to consume such fattening ingredients anyway!  With that said, this recipe was not on my list of favorites. Again, I'm most certainly not a fan of honey. I think it smells weird. As for peaches..? Yea, they are deliciously juicy and tasty when eaten as a solo fruit...but it's not something I want in my creamy frozen dessert. Negative. So, I went ahead and added some chunks of semi sweet chocolate hoping it would appeal to my taste buds. Newsflash, it didn't; HOWEVER, my veterinarians office were quite grateful for their refreshing June afternoon treat. See, I aim to please :)

However, there are some positives to this weeks TWD recipe, chosen by Tommi of Brown Interior. (P.S. Tommi, I ain't mad atcha, big fan of your blog!)  At the very least, I've been studying frozen desserts and egg based ice creams in culinary school this past week, so this selection gave me yet another opportunity to meander down the avenues of ice cream town. You can see my other ice cream creations on my most recent post.

Tommi, you still rock.


Sunday, June 14, 2009

ICE CREAM SUNDAY

Well, it's official, I'm in love with my Kitchen Aid ice cream attachment. It rules. This past week in class, we had a whole bunch of lessons on frozen desserts, including egg based french ice cream recipes. I've had this ice cream attachment for over a year now and the last and only time I used it was for a TWD recipe that was selected around this time last year: blueberry sour cream ice cream. Why have I waited this long to explore the world of "frozen custard"? It's creamy, delicious, and especially refreshing during these hot summer months. Heck, my love for ice cream making is so grand that I'll be making ice cream through the winter as well. So take that! 

Photographed above is fudge ripple tin roof ice cream from David Lebovitz's The Perfect Scoop. This. Was. Amazing.  Picture this: vanilla bean based ice cream studded with chocolate covered peanuts and a fudge ripple burst within each bite. Mmmm. This recipe calls for a "make-your-own" chocolate covered peanuts as well as fudge ripple.  I followed the peanut recipe, however, in class last week we homemade every component to an ice cream sundae including chocolate fudge. I brought home a huge tub of it and decided to use that as my fudge ripple rather than making more. It was perfect.

Next up on my Sunday of ice cream obsession came cake batter ice cream.  Seriously what's better than cake batter? Nothing! When I was first introduced to cake batter ice cream from cold stone creamery I truly thought the flavor was pure genius.  Once I realized I could make it myself, I was in heaven.  Photographed above is just that, cake batter ice cream with colored sprinkles. This tasted like a creamy, thicker, more dense-melt in your mouth version of actual cake batter.  Again, deeeeelish!  If you have an ice cream maker, go ahead and make these scoops of love, you won't regret it!

Tin Roof Ice Cream
Source: The Perfect Scoop by David Lebovitz

¾ cup whole milk

¾ cup sugar

Pinch of salt

1 ½ cups heavy cream

½ vanilla bean, split lengthwise

4 large egg yolks

¼ teaspoon vanilla extract

¾ cup Chocolate-Covered Peanuts

Fudge Ripple

Warm the milk, sugar, salt and 1/2 cup of the cream in a medium saucepan. With a sharp paring knife, scrape the flavorful seeds from the vanilla bean and add them, along with the pod, to the hot milk mixture. Cover, remove from the heat, and let steep at room temperature for 30 minutes.

Rewarm the vanilla-infused mixture. Pour the remaining 1 cup cream into a large bowl and set a mesh strainer on top. In a separate medium bowl, whisk together the egg yolks. Slowly pour the warm mixture into the egg yolks, whisking constantly, then scrape the warmed egg yolks back into the saucepan.

Stir the mixture constantly over medium heat with a heatproof spatula, scraping the bottom as you stir, until the mixture thickens and coats the spatula. Pour the custard through the strainer and stir it into the cream to cool. Remove the vanilla bean, wipe it clean of any egg bits, and add it back to the custard. Stir in the vanilla and stir until cool over an ice bath. Chill thoroughly in the refrigerator.

Then ready to churn the ice cream, remove the vanilla bean (it can be rinsed and reused). Freeze the ice cream in your ice cream maker according to the manufacturer’s instructions. While the ice cream is freezing, chop the peanuts into bite-sized pieces. “

Fold the peanut pieces into the frozen ice cream as you remove it from the machine, and layer it with Fudge Ripple.

Chocolate-Covered Peanuts

4 ounces semisweet or bittersweet chocolate, chopped
1 cup roasted, unsalted peanuts

Put the pieces of chocolate in an absolutely dry heat proof bowl. Set the bowl over a saucepan of simmering water to melt the chocolate, stirring until smooth. In the meantime, stretch a piece of plastic wrap over a dinner plate.

Once the chocolate is melted, remove it from the heat and stir in the peanuts, coating them with the chocolate. Spread the mixture on the plastic-lined plate and chill.

Fudge Ripple

1/2 cup sugar
1/3 cup light corn syrup
1/2 cup water
6 tablespoons unsweetened Dutch-process cocoa powder
1/2 teaspoon vanilla extract

Whisk together the sugar, corn syrup, water, and cocoa powder in a medium saucepan. Heat over medium heat, whisking constantly, until the mixture begins to bubble at the edges.

Continue to whisk until it just comes to a low boil. Cook for 1 minute, whisking frequently. Remove from the heat, stir in the vanilla, and let cool. Chill in the refrigerator before using.


Cake Batter Ice Cream

1 cup half & half
3/4 cup sugar
2 cups heavy cream 
1 teaspoon vanilla extract
1 cup cake mix (I used confetti with the sprinkles)

Directions

Whisk the half & half and granulated sugar until the sugar is dissolved. 
Stir in the heavy cream and vanilla and then stir in cake mix (to avoid lumps sift in).
Pour mixture into the freezer bowl and churn as directed by your machine. 
Remove ice cream from freezer bowl and place into a freezer proof container and freeze for 8-10 hours.

Tuesday, June 9, 2009

TWD: PARISIAN APPLE TARTLET

Note to self: When puffed pastry makes its way into my baking and pastry arts culinary program curriculum, be sure to pay attention; and a whole lot of it.  You see, this was my first time working with puffed pastry. Oy vey. Based on the TWD Q&A section, most members used Pepperidge Farms frozen puffed pastry. Not me. I, on the other hand, decided to make the puffed pastry dough from scratch. Yikes. I used Nick Malgieri's "Quickest Puffed Pastry" recipe. Quick? Yes. Easy? No.  I followed the directions to a T and then added the quartered 1/2 apple, brown sugar, and bits of butter. Wallah. Photographed above is my version of a Parisian apple tartlet.  While the actual pastry was flaky, buttery, crispy, and delicious; my presentation was disgraceful! 

Thanks to Jessica of My Baking Heart who chose this weeks TWD recipe. Because of Jessica, I now officially realize how much I have to learn regarding puffed pastry!

Tuesday, June 2, 2009

TWD: CINNAMON MINI MUFFINS

These were my take on this weeks TWD recipe: Cinnamon Squares, chosen by Tracey of Tracey's Culinary Adventures. Rather than making, well..er, squares; I went with mini muffins and topped them off with a dollop of cinnamon cream cheese frosting. The consistency of these little suckers were more like mini cinnamuffins (cinnamon buns in mini muffin form). The sprinkling of mini chocolate chips in the center added the a perfect chocolate touch.

I went baking cup liner-less in the pans to render less of a mini cupcake feel and more of a mini muffin appearance.  These were a delicious little bite sized treat. Since this recipe has caused me to clearly rebel against the whole "square" thing, the next time I make these, an 8 inch round pan will be in the mix..


Monday, June 1, 2009

BIRTHDAY CUPCAKES

Another birthday calls for more cupcakes. I obviously slated myself to provide the goodies and to hone in on my new found culinary skills;  so here they are.  Vanilla bean buttermilk cupcakes topped with a yellow vanilla bean Swiss meringue buttercream. Ahh, my chef instructor would be so proud.

I made 1 dozen regular sized cuppies followed by 1 dozen mini's.  The minis are exact clones of their parents (the regulars). They are so freakin cute. As for the taste of these cuppies..whoa.  Who knew vanilla bean buttermilk cupcakes could be so incredibly delicious. The recipe calls for vanilla extract, but I went the extra mile and added an additional vanilla bean (the seeds) for an extra vanilla kick. It definitely did the trick, as these were bursting with vanilla! These cupcakes were very moist and soft and the Swiss meringue buttercream added the perfect compliment.

I put these in a beautiful linen box and wrapped a bow around them. Nothing beats a birthday present quite like cupcakes.  This recipe came from the much adored book, Sky High: Irresistible Triple Layer Cakes. Go buy this book, it's incredible!

Vanilla Buttermilk Cake
from Sky High, Irresistible Triple Layer Cakes by Alisa Huntsman and Peter Wynne
4 whole eggs
2 egg yolks
2 teaspoons vanilla extract
1 1/4 cups buttermilk
3 cups cake flour
2 cups sugar
4 1/2 teaspoons baking powder
1/2 teaspoon salt
2 sticks (8 ounces) unsalted butter, at room temperature

Preheat the oven to 350 degrees F. Butter the bottoms and sides of three 8-inch round cake pans or spray to coat with vegetable oil. Line the bottom of each pan with a round of parchment or waxed paper and grease the paper.
Put the eggs and yolks in a medium mixing bowl, add the vanilla and 1/4 cup of the buttermilk. Whisk to blend well.
Combine the flour, sugar, baking powder, and salt in a large mixer bowl; whisk to blend. Add the butter and the remaining 1 cup buttermilk to these dry ingredients and with the mixer on low, blend together. Raise the mixer speed to medium and beat until light and fluffy, about 2 minutes.
Add the egg mixture in 3 additions, scraping down the sides of the bowl and mixing only until thoroughly incorporated. Divide the batter among the 3 prepared pans.
Bake the cake layers for 28-32 minutes, or until a cake tester or wooden toothpick inserted in the center comes out clean and the cake begins to pull away from the sides of the pan. Let the layers cool in the pans for 10 minutes; then carefully turn out onto wire racks, peel off the paper liners, and let cool completely.
To assemble the cake, place one layer, flat side up, on a cake stand or serving plate. Spread 3/4 cup of the frosting over the layer, right to the edge. Repeat with the next layer. Place the last layer on top and use all but 3/4 cup of the frosting to cover the top and sides of the cake. With an offset spatula, smooth out the frosting all over. Place the remaining frosting in a pastry bag fitted with a medium star tip and pipe a shell border around the top and bottom edges of the cake.

Vanilla Swiss Meringue Buttercream
adapted from Martha Stewart

1 c egg whites (from about 6 large eggs)
1 1/2 c sugar
pinch of salt
1 lb 4 oz unsalted butter, at room temperature
2 t vanilla extract (or seeds of 1/2 vanilla bean)
squeeze of lemon juice

1)Combine the egg whites, sugar and pinch of salt in a large metal bowl (I usually do this right in my stand mixer bowl).  Put the bowl over a pot of simmering water (double boiler-style), and whisk until the sugar is completely dissolved.  The mixture will feel hot to the touch.

2)Transfer the hot mixture to your stand mixer and whip on high speed until it turns white and about doubles in size.  This will take about six minutes.  Beat in the vanilla and the lemon juice.

3)Add the butter, a few tablespoons at a time, on medium speed, mixing after each addition.  Raise the speed and beat until smooth; this may take up to ten minutes.  The mixture may appear curdled along the way; this is normal.  Just keep beating and the mixture will become smooth again.

-Buttercream will keep, covered air-tight and refrigerated, for up to two weeks.  Bring to room temperature, then beat on low speed before using.