Wednesday, December 24, 2008

OODLES OF HOLIDAY DESSERTS

Between all the baking and holiday obligations over the last few weeks I've been unable to keep up with the posts/blogging. Therefore I'm just going to post pictures of all the baking I've been doing lately with their respective recipes--click on the title of each for the recipe. Everything was delicious. Happy Holidays!!

First up.....
For the actual cookie dough and the crust I used this recipe
(Baked in a 6inch round pan)
(The best muffins I've ever had)

Tuesday, December 16, 2008

CUPCAKES & JEWELRY

My best friend has this unbelievableeeeee jewelry line called Light By Sky which she and her mother design. Rather than a Tupperware party or a handbag party, we teamed up to create a cupcakes and jewelry party to promote both her gorgeous jewelry and my delicious cupcakes! Seriously, if a Tupperware party can be fun then pairing jewelry with cupcakes (and cocktails) is a no brainer.
For the cupcakes: I made two varieties of about 160 mini bite sized cupcakes---Red Velvet with cream cheese frosting and Vanilla Oreo cupcakes with Oreo frosting. Both of these came out amazing!! I would say that about 5 of these babies would equate to 1 whole cupcake; that's how mini they are. For the red velvet cake and cream cheese frosting, I used the recipe from this post which I've used before and it is just about fool proof with a delicious taste. For the vanilla cake I used the recipe from this post (my good ol' Billy's recipe) and added 1 cup of crushed Oreo's to the batter before baking. I then frosted the mini's with the recipe from this recent post.
.........................BUT! The star of tonight's party is the jewelry, hands down. Check out her amazing website just in time for the holidays!!

TWD:BUTTERY JAM COOKIES

Heather of Randomosity and The Girl chose this week's TWD recipe: Buttery Jam Cookies. I'm not sure what I was expecting from this cookie. Perhaps a cookie made with lots of butter, sandwiched between some kind of jam--more like a linzer...? So, when I read through the recipe and saw that the apricot jam was to be mixed throughout the dough, I was obviously on the wrong track with my similar-to-a-linzer theory. Unfortunately, I have to say that this is the first Dorie recipe that I'm utterly disappointed in. Dorie, don't be mad. I have loved every single one of your recipes since I've started this fun group and this one just didn't make the cut. I guess that was bound to happen, right? I forgive you.
While this cookie combines the flavors of ginger and apricot jam, the taste was very bland and blah. I did everything in my power to salvage these cookies so I dipped them in melted butter and rolled them around a cinnamon and sugar mixture. End result: these were OK. On the upside, the cookies were a cinch to make and I'm sure would satisfy the "not-so-sweet tooth" kind of person. Check out Heather's blog for the recipe.

Monday, December 15, 2008

SUGAR COOKIE FROSTING CUPS

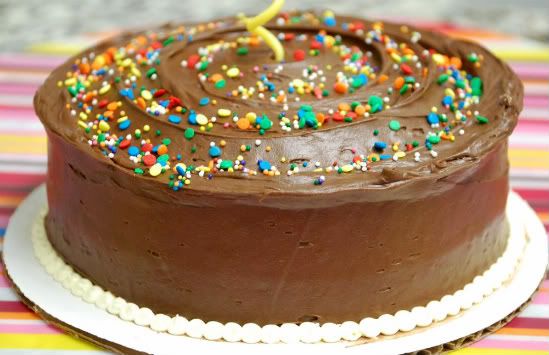
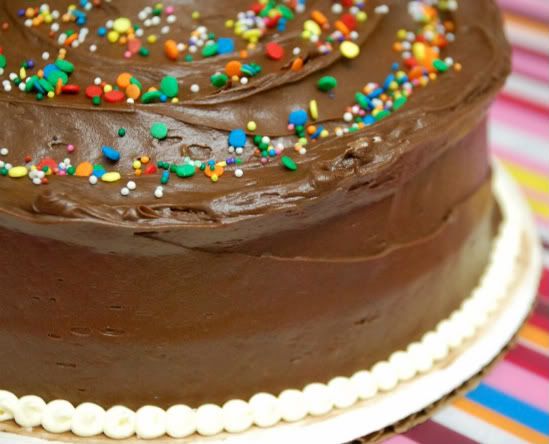
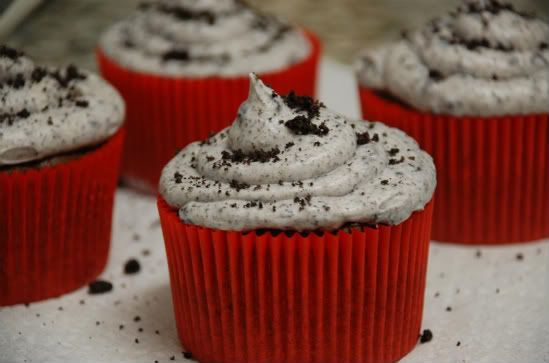
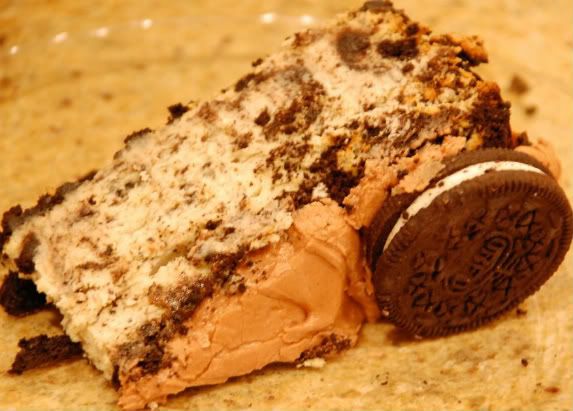
Have you ever licked frosting off a spoon...? Your finger?...A bowl...? All of the above? Or, my fellow frosting enthusiasts, have you ever just stuck your bare hand into a bowl of frosting and licked it sans utensils? C'mon now...don't lie...I know you have. No, really..there's no need to hide your secrets here. Well, this post is dedicated to all those frosting lovers out there. Can I get a what-what? OK, kidding. Moving on.
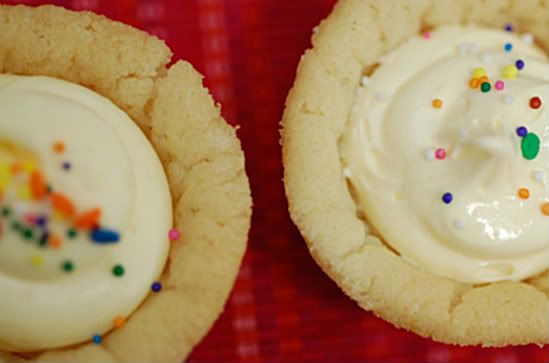
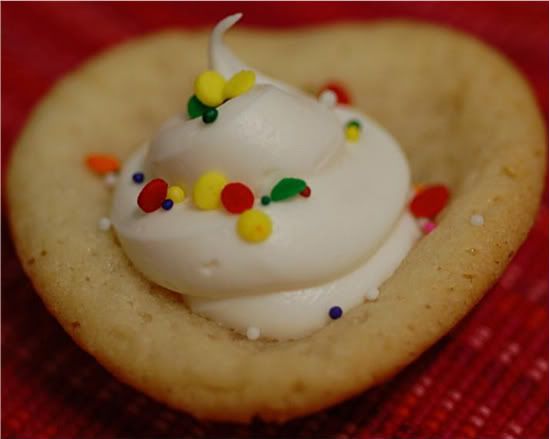
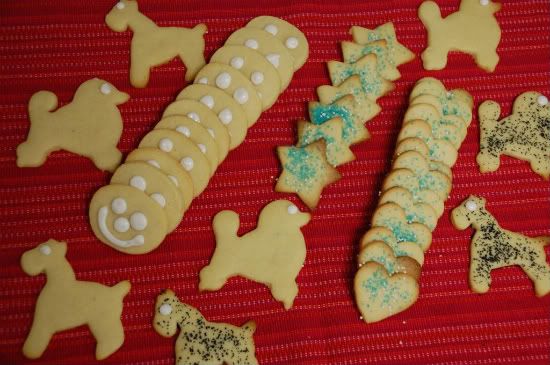
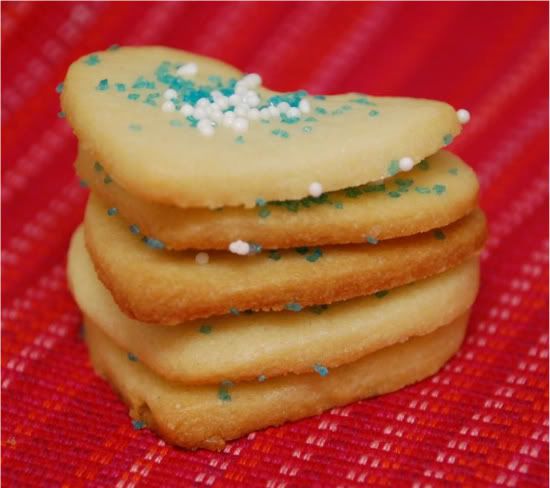
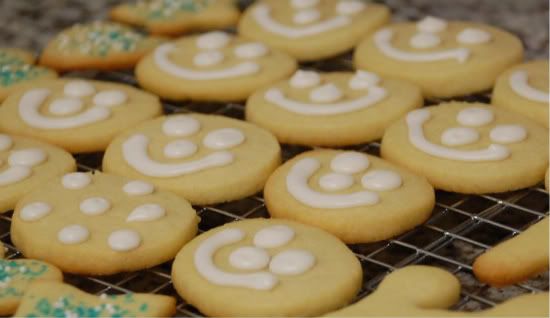
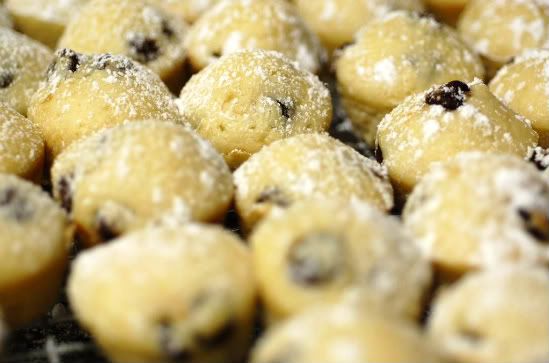
Sugar cookie dough, frosting, and sprinkles is all you need for this fun little creative treat. Last week my fun Tuesday's With Dorie group made Grandma's All Occasion Sugar Cookies and I enjoyed them so much that I decided to use this recipe for the base of my sugar cookie cups. I followed the exact recipe and then rolled them out according to the directions. After rolling them out, I used a 3.5 inch round cookie cutter and stuffed them into greased and floured mini muffin pans. Once cooled, I filled each cup with this frosting and topped them off with a colorful sprinkle medley. The frosting was absolutely delicious and easy to pipe. This is a fun way to eat frosted sugar cookies with an extra umpf of frosting. You can fill these with any type of frosting imaginable! I'm going to serve these for a get together tomorrow night where I think they will go very quickly!! They are soooooo good. Enjoy.
(This post is dedicated to my dear friend, Jana)
Grandma's All Occasion Sugar Cookies
From Dorie Greenspan's: "Baking, from My Home To Yours"

INGREDIENTS
2 cups all-purpose flour
1/2 teaspoon salt
1/2 teaspoon baking powder
1 stick plus 2 tablespoons (10 tablespoons) unsalted butter, at room temperature
1 cup sugar
1 large egg
1 large egg yolk
1 teaspoon pure vanilla extract
Sugar or cinnamon sugar, for dusting (optional)

Whisk the flour, salt and baking powder together.

1. Working with a stand mixer, preferably fitted with a paddle attachment, or with a hand mixer in a large bowl, beat the butter at medium speed for a minute or so, until smooth. Beat in the sugar and continue to beat for about 2 minutes, until the mixture is light and pale. Add the egg and yolk and beat for another minute or two; beat in the vanilla. Reduce the mixer speed to low and steadily add the flour mixture, mixing only until it has been incorporated — because this dough is best when worked least, you might want to stop the mixer before all the flour is thoroughly blended into the dough and finish the job with a rubber spatula. When mixed, the dough will be soft, creamy and malleable.

2. Turn the dough out onto a counter and divide it in half. If you want to make roll-out cookies, shape each half into a disk and wrap in plastic. If you want to make slice-and-bake cookies, shape each half into a chubby sausage (the diameter is up to you — I usually like cookies that are about 2 inches in diameter) and wrap in plastic. Whether you're going to roll or slice the dough, it must be chilled for at least 2 hours. (Well wrapped, the dough can be refrigerated for up to 3 days or frozen for up to 2 months.)

3. Center a rack in the oven and preheat the oven to 350 degrees F. Line two baking sheets with parchment or silicone mats.

4. If you are making roll-out cookies, working with one packet of dough at a time, roll out the dough between sheets of plastic wrap or wax paper to a thickness of 1/4 inch, lifting the plastic or paper and turning the dough over often so that it rolls evenly. Lift off the top sheet of plastic or paper and cut out the cookies — I like a 2-inch round cookie cutter for these. Pull away the excess dough, saving the scraps for rerolling, and carefully lift the rounds onto the baking sheets with a spatula, leaving about 1 1/2 inches between the cookies. (This is a soft dough and you might have trouble peeling away the excess or lifting the cutouts; if so, cover the dough, chill it for about 15 minutes and try again.) After you've rolled and cut the second packet of dough, you can form the scraps into a disk, then chill, roll, cut and bake.

5. If you are making slice-and-bake cookies, use a sharp thin knife to slice the dough into 1/4-inch-thick rounds, and place the rounds on the baking sheets, leaving about 1 1/2 inches of space between the cookies.

6. Bake the cookies one sheet at a time for 9 to 11 minutes, rotating the sheet at the midpoint. The cookies should feel firm, but they should not color much, if at all. Remove the pan from the oven and dust the cookies with sugar or cinnamon sugar, if you'd like. Let them rest for 1 minute before carefully lifting them onto a rack to cool to room temperature.

7. Repeat with the remaining dough, cooling the baking sheets between batches.
Storing: The cookies will keep at room temperature in a tin for up to 1 week. Wrapped well, they can be frozen for up to 2 months.

Wednesday, December 10, 2008

CHOCOLATE BIRTHDAY CAKE

As the previous post mentioned, I made a chocolate birthday cake for my boss last night. I used the same chocolate cake mix recipe as above and used this chocolate fudge frosting recipe. I swirled the icing on top with an angled spatula creating chocolate spiral-like structures and then sprinkled a mixture of colorful sprinkle-type decorations.
I had a tiny bit of leftover vanilla buttercream from the cupcakes and piped little dots around the cake board. I got great feedback on the cake! It was really easy to put together and best of all, it was so pretty!
Cake recipe found in this post.
Chocolate fudge frosting recipe found here.
Vanilla buttercream recipe found in this post.

CHOCOLATE CUPCAKES WITH COOKIES AND CREAM FROSTING

I made my boss a chocolate birthday cake (post to follow) and had some leftover batter, so I decided to make some cupcakes. I made a very basic vanilla buttercream and put about 8 or so Oreo's in my food processor-processed them until ground, then mixed them into the buttercream. What I'm about to say make shock most of you, but I'll be the first to admit that I used a partial cake mix recipe for the chocolate cake. My reasoning behind such madness is that I really had no time to put together an entire batter from scratch so I figured I'd give this recipe a try, on the rare occasion I need to whip something up in record timing. Well, this cake sure was good. It didn't taste cake-mixish at all and the consistency was that of a homemade cake, a.k.a. dense. It was very chocolatey and rich and paired beautifully with the buttercream. Obviously, I would take an actual cake made from scratch over this bad boy, however, this was a more than reasonable substitute for someone with very little time. Enjoy.
Wannabe Homemade Chocolate Cake
Ingredients:
1 box devil’s food cake mix
1 package Jello instant chocolate pudding mix
1 cup sour cream
1 cup vegetable oil
4 eggs, beaten
1/2 cup milk
2 tsp pure vanilla extract
2 cups mini semisweet chocolate chips
_________________________________
Buttercream Recipe found here + crushed Oreo's.
Combine all ingredients except for the chocolate chips in a very large mixing bowl (there is a lot of batter so make sure you have a big enough bowl!). Beat until thick. Stir in chocolate chips. Pour batter in baking pans and set baking times according to the chart on the back of the box. Cool in pans then invert and let cool entirely on a wire rack. Ice and decorate at your own risk!

Tuesday, December 9, 2008

TWD: GRANDMA'S ALL OCCASION SUGAR COOKIES

Ulrike of Kuchenlatein chose Grandma's All-Occasion Sugar Cookies for this week's Tuesday's With Dorie entry. I posted about sugar cookies (here) a while back and I wasn't thrilled with them all together. I've always been under the impression that sugar cookies were boring and tasteless unless topped with creamy icing of some sort. However, my feelings have changed after making these and creamy icing is completely unnecessary. This recipe produces the quintessential sugar cookie; buttery, crispy, soft in the center and just sweet enough. They were super easy to make and rolled out beautifully. I used a hand full of different cookie cutters to create various shapes and sizes. I made hearts....
Then moved on to stars...
Smiley faces...
And Poodles and Schnauzers for fun...
If only I could have created a Schnoodle cookie...ha, ok I'm signing off for now... :)

Monday, December 8, 2008

TWD: BELATED LINZER SABLES

I'll make this quick. Nick of Living The Life chose this recipe and my dad really thanks you, Nick. No, really, he personally wanted to thank you because linzers are his favorite kind of cookie! I was away for the Thanksgiving holiday and I'm finally caught up with my sugar cookies ready for posting tomorrow. These linzers were deeeeelicious. They were crispy and crunchy with the slightest hint of cloves sandwiched between sweet raspberry jam. I used walnuts as my nut-base however, next time I'm going to grind up hazelnuts and spread some Nutella in between. These cookies were pretty easy to make and I plan on making more for the holidays. You can find the recipe here.

Thursday, December 4, 2008

TWD: TWOFER PIE

This TWD entry is about a week late but I was out of town for the holiday and hadn't gotten a chance to post! I left my camera USB cord at home and couldn't upload the pictures while I was away. The linzer sables will be posted tomorrow and then I'll finally be caught up! Anyway, on to the twofer pie. Vibi from La Casserole Carree chose this pie for our weekly Tuesday's With Dorie entry and I'm so glad she did. This is a dually flavorful pie containing a layer of pecan pie atop a layer of pumpkin pie all baked in Dorie's buttery flaky pie crust shell. I was able to knock off 2 pies for the price of one for Thanksgiving and everyone really enjoyed it. I found the crust to be super easy to work with. It's very pliable and doesn't crack or break. The last time I made Dorie's pie crust (her blueberry pie), the directions did not include putting the crust in the fridge after it had been rolled out to a 12 inch circle. However, this recipe indicated to do so and it made all the difference. From here on out, I'll roll out my pie dough, trim it to the appropriate diameter, then put it in the fridge to firm up for about 20 minutes. It really made my life a lot easier and relieved with my pie-rolling anxiety.
The pumpkin layer is all done in a food processor which made the labor and cleaning up a cinch and the pecan layer is a few ingredients whisked together in a bowl--also, very easy. Overall this pie was very good and I'd like to play around with it and create different layers other than pecan and pumpkin. The twofer pie is perfect for this time of year and I would encourage everyone to make it during the holiday season! You can find the recipe on Vibi's blog found here.

Wednesday, December 3, 2008

DEVIL DOG WHOOPIE PIES

OK, seriously....these were amazing!! They tasted exactly like the old school devil dogs with a homemade vibe. Oh how I LOVED devil dogs growing up. My mom packed my lunch box with 1 devil dog everyday for as long as I can remember and when I was given the opportunity to home-make these I was all over it! I got the recipe from joy of baking which is an excellent site for both basic and elaborate desserts. Every recipe I've ever made from this site has turned out fabulously. I made these for Thanksgiving to stray away from your typical pumpkin themed desserts for those who dislike pumpkin. Don't get me wrong, I made plenty of pumpkin desserts but I thought the kids in my family (by kids, I mean my little cousins) would enjoy these. The vanilla filling had a great texture and held it's shape without spilling over the edges; making it a messy-free cookie. The actual cookie and filling was so easy to make. I will most definitely be making these again, perhaps with a chocolate based filling. I'd also like to try these with a vanilla cookie and almond filling by adding a little almond extract. How about a chocolate cookie with mint filling? Yum. Please make these, you'll love them.
Recipe found here.

Tuesday, December 2, 2008

OREO CHEESECAKE

This is one of the many dessert dishes I made for Thanksgiving. This cheesecake turned out fabulously. If you like Oreo's, then this recipe is most definitely for you. The filling contains chunks of coarsely chopped Oreo's within a sea of silky cream cheese. I doubled the Oreo crust so that it extended up the sides of the cheesecake and sprinkled chopped Oreo's on top before baking.
I allowed the cheesecake to sit in the fridge for 24 hours before whipping up a quick mini batch of chocolate buttercream to spread across the top and use as glue for the Oreo garnish. I doubled the amount of crushed Oreo's within the filling as well as on top. More Thanksgiving Day desserts to come as well as my very belated TWD entries!
*Note: I apologize for the poorly lit photos---Everything in my mother's kitchen bounces off as a yellowish hue*
Oreo Cheesecake

Crust
1 1/2 C. Oreo Cookie Crumbs (about 23 Oreo cookies finely chopped) ( I used 3 cups)
2 Tbsp. Melted Butter (4Tbsp)
Filling - all ingredients need to be at room temperature
1 1/2 lb. Cream Cheese
1 C. Sugar
5 Large Eggs
1/4 tsp. Salt
2 tsp. Vanilla
1/4 C Flour
8 oz Sour Cream (I used Fat-Free)
5 Oreo Cookies (coarsely chopped for the batter) (10 Oreos)
10 Coarsely Chopped Oreo Cookies for the Top of Cheese Cake (15 Oreos)
Butter bottom and sides of a 9-inch springform pan. Mix melted butter with Oreo crumbs and press into the pan, covering the bottom and 1 1/2" up the sides. Set aside.
Preheat oven to 325.Beat cream cheese until light and fluffy. Keeping the mixer on low setting, gradually add sugar and continue beating cream cheese until mixed through. Add eggs one at a time and continue to beat until blended. Measure the vanilla, salt and flour; pour into cream cheese and egg mixture and beat until smooth. Add the sour cream and beat well. Turn off the mixer and stir in the coarsely chopped Oreo cookies with a spoon.Pour filling into the springform pan and sprinkle the coarsely chopped Oreo Cookies on top. Place pan on the top rack and in the middle of the preheated oven, and bake for one hour and 15 minutes. When time is up, prop the oven door open and let the cheese cake stay in the oven for one hour.Remove from oven and let cool completely. Refrigerate for 24 hours. It is worth the anticipation. A cheese cake should season. The flavor ripens and becomes enriched.