Wednesday, April 30, 2008

BANANA CAKE

MOST MOIST BANANA CAKE EVER

I thought banana bread would be a nice change.  I've been searching around for a great recipe over the last few weeks and finally found one! Before I begin, let me just say; if you love a moist banana cake then this one is for you. The moisture from this cake can't even be legal, but at the same time, it's not wet and soggy. I despise loaf cakes that are dense and dry--resembling cardboard. The moisture really binds the incredible banana flavor in this cake. 
When I search for generic recipes such as banana cake, a basic yellow cake, chocolate cake, etc., I find myself resorting to sites such as allrecipes.com, cooks.com, et al. I wouldn't normally use recipes from such sites, (they are good for certain things) however, I base my recipe selections on user reviews because it is the only source of virtual criticism I'm going to get when getting recipes off the net. Obviously my preference would be to actually taste it myself--but it is what it is. With that being said, this banana cake had the most fantastic reviews that I absolutely couldn't turn it down. 
Moist, check. Delicious, check. 5 star cake, check. I'm sold.
This recipe calls for a 9x13 pan, however I broke it down differently. I used one-9inch round pan, one standard size loaf pan, and I topped it off with 1 mini loaf pan.  For the standard and mini loaf pans I added mini chocolate chips and left out the white chocolate cream cheese icing. For the 9-inch round pan I baked the recipe as is, without any additions or subtractions. I encourage you all to make this!! I've gotten incredible feedback!

INGREDIENTS

  • 3/4 cup butter
  • 2 1/8 cups sugar
  • 3 large egg
  • 2 teaspoons vanilla
  • 3 cups flour
  • 1 1/2 teaspoons baking soda
  • 1/4 teaspoon salt
  • 1 1/2 cups buttermilk
  • 2 teaspoons lemon juice
  • 1 1/2 cups mashed ripe banana
  • FROSTING

    Directions

    1. 1
      Preheat oven to 275°.
    2. 2
      Grease and flour a 9 x 13 pan.
    3. 3
      In a small bowl, mix mashed banana with the lemon juice; set aside.
    4. 4
      In a medium bowl, mix flour, baking soda and salt; set aside.
    5. 5
      In a large bowl, cream 3/4 cup butter and 2 1/8 cups sugar until light and fluffy.
    6. 6
      Beat in eggs, one at a time, then stir in 2 tsp vanilla.
    7. 7
      Beat in the flour mixture alternately with the buttermilk.
    8. 8
      Stir in banana mixture.
    9. 9
      Pour batter into prepared pan and bake in preheated oven for one hour or until toothpick inserted in centre comes out clean.
    10. 10
      Remove from oven and place directly into the freezer for 45 minutes.
    11. 11
      This will make the cake very moist.
    12. 12
      For the frosting, cream the butter and cream cheese until smooth.
    13. 13
      Beat in 1 tsp vanilla.
    14. 14
      Add icing sugar and beat on low speed until combined, then on high speed until frosting is smooth.
    15. 15
      Spread on cooled cake.
    16. 16
      Sprinkle chopped walnuts over top of the frosting, if desired.


    Monday, April 28, 2008

    COOKIE DOUGH CHEESECAKE

    COOKIE DOUGH CHEESECAKE SQUARES

    After hours of playing with my new pups, it was time for them to take a nap and time for mommy to bake for her blog! This week is going to be a crazy week--my hands will be full with the dogs and I'm hosting a cinco de mayo party (recipes and pictures to follow), so I figured yesterday might be my only opportunity to bake.  I was fishing through one of my favorite sites, bake or break, and Jennifer's most recent entry featured these cookie dough cheesecake squares. I was so drawn in with her pictures that I found myself walking to the kitchen like a zombie, taking out ingredients left and right, all before I was even done reading the entry. 
     
    The title of this recipe pretty much explains it all. Graham cracker crust, cheesecake layer, followed by dollops of chocolate chip cookie dough. My favorite part of this recipe is the crust (photographed in detail above) which contains mini chocolate chips. I went ahead and drizzled semi-sweet chocolate on top, however, the next time I make these I'm going to leave that part out. These were sooooo sweet that they definitely didn't need the extra chocolate. These bars are diabolically sinful, end of story..

    Recipe found here


    BOOMER&BENTLEY

    BOOMER & BENTLEY
    I want to welcome my two new additions; Boomer & Bentley-9 week old brothers. Unfortunately, I tragically lost my 2 year old, Shea, about a month ago when he ate a foreign object in the backyard which ultimately caused an obstruction leading to his death. I have been a mess over it since I lost him and decided to call the same breeder where I got Shea to see if she had anything available. Barbara Clardy, of Barleycroft Kennels is by far the most fabulous breeder I have dealt with.  I currently have 3 mini Schnauzers and the 2 Goldendoodles, shown above, and in the past, I've had several poodles and Shar-Pei's.  With that being said, Barbara is so fantastic. From the moment her puppies are born, she holds them close to her and coddles them resulting in their overwhelming desire to constantly want to be close to their owners. They are like little babies..I'm so in love. In addition, her facility is so clean and her puppies are absolutely beautiful!! I would recommend Barbara to ANYONE who is looking for a dog with an amazing disposition, intelligence, and non-shedding! Boomer is the blond and Bentley is the black. Enjoy the pictures!


    POODLE + GOLDEN RETRIEVER = GOLDENDOODLE!


    Friday, April 25, 2008

    MATZOH BRITTLE

          MATZOH BRITTLE
                         
    I realize there are only a few more days left of Passover, but better late than never.  My bosses always keep Passover to the most serious degree and they absolutely love dessert. As they do every year, they expected me to bring in lots of Passover yummies; why should this year be any different? Unfortunately, I had a very busy week and was unable to bake the much anticipated, much talked about, flour less chocolate cake found here. I felt badly that I didn't meet their palate's expectations of Passover dessert, so I decided to make Matzoh brittle last night- a.k.a matzoh "crack". These little chocolate crunchy squares of deliciousness are addicting. I suggest making these on a full stomach!! It's so quick and easy to make and the entire process takes a total of about 20 minutes. Clean up is so simple and 4-6 pieces of matzoh goes a very long way with this recipe. I personally used 6 pieces of matzoh and once I broke them up it filled up an entire 1 gallon bag! Forget Passover, I would make these all year long if I didn't find myself eating so much of it..

    DIRECTIONS                                                                
    Ingredients:
    2 sticks of unsalted butter
    1 cup of brown sugar
    1 teaspoon Vanilla
    1 bag chocolate chips (12 oz)
     
    Cover cookie sheets with tin foil. Line the sheets with matzoh. To fill in the spaces, I broke pieces of matzoh to fill all the spaces on the cookies sheets. 

    In a saucepan, melt butter and brown sugar. Once the mixture comes to a boil add the vanilla. Mixture should bubble. Once it bubbles, remove from heat and pour over matzoh. Bake at 350 degrees for 10 minutes (my oven only required 7 minutes) or until edges start to brown. Remove cookie sheets from oven and immediately sprinkle chocolate chips on top of matzoh. Use a knife to spread chocolate all around. Put cookie sheets in the fridge for about 1 hour and break matzoh up in little pieces once chocolate hardens.  

    **Notes**
    I went above and beyond and used my more expensive Ghirardelli chocolate chips. You can really taste the difference! I also added tad bit more brown sugar to make it super sweet. As noted above, the brittle was done in about 7 minutes. I think it would have burned if I left it in for 10 minutes. Keep a close eye on your brittle. I've also made this brittle without the vanilla extract and it is just as good, so it's a personal preference. 


    Tuesday, April 22, 2008

    TUXEDO CAKE

    TUXEDO CAKE
    I received my much anticipated delivery of King Arthur Flour products yesterday. Included were 2 different sizes of square spring form pans. I have a gazillion sizes of round spring forms, but no square. I was so anxious to use them, thus resulting in the esteemed Tuxedo cake above. I kind of just went with this theme as I baked it. I knew I wanted to use the two sizes of square pans as a layer cake but I wasn't exactly sure how I was going to decorate it until it came down to it; game time decision. Both pans were filled with one of my favorite yellow cake batters found here. I had a lot of leftover chocolate and vanilla buttercream from my cake decorating course and decided to use that, instead of whipping up a new batch--which, quite frankly, gets extremely tedious and only adds on to the already huge mess I always tend to create. I used different variations of the star tip for decorating as well as white nonpareils that I purchased at, where else?-Michaels. I like the way this cake came out! If I hadn't baked it on such a whim I would have actually planned out more elaborate decorations, icing colors, etc. This would be a cute cake to take to a dinner party or something of that nature. Enjoy!


    Friday, April 18, 2008

    PB CHOCOLATE CHIP PIE

    CHRIS' PEANUT BUTTER CHOCOLATE CHIP PIE
    I travel to Florida quite frequently throughout the winter. Being that I went to school for 4 years down in Miami, I have a bunch of friends that are still living down there--not to mention, my parents and entire immediate family live in South Florida.  The Jewish holidays are about to begin (Passover) and I am headed down South for the weekend.  
    My friend Chris, from college, often picks me up from the airport for my weekend getaways. However, there is always a catch....he requires me to bring him some sort of baked good each occasion he picks me up.  I figure it's a fair deal so I always comply. In the past, I have baked him brownies, cookies, cashew bars, etc. Knowing how much of a peanut butter lover he is, I decided to bake him a peanut butter chocolate chip pie--RIGHT UP HIS ALLEY! I found this recipe on Bakerella which is originally adapted from Nestle classic recipes. This pie is so easy and it came out beautifully. The crust came out perfectly crunchy and the inside is gooey peanut butter chocolate heaven; no really, trust me. The original recipe calls for just 6 ounces of semi-sweet chocolate chips but I  bumped that up to about 8 ounces and also added in an additional 6-7 ounces of peanut butter chips. I had zero control last night and HAD to cut myself a sliver. My excuse: "I wanted to take a picture of a slice of the pie for my blog." I hope he enjoys it--I know I did.

    DIRECTIONS: *my changes in red*
    2 eggs 
    1/2 c. all-purpose flour 
    1/2 c. sugar 
    1/2 c. finely packed brown sugar 
    1 c. butter, melted and cooled 
    1 (6 oz.) pkg. (1 c.) Nestle's Toll House semi-sweet chocolate chips 
    I used 6 oz semi-sweet chips and 8oz peanut butter chips
    1 c. chopped pecans or walnuts 
    I omitted these
    1 (9") unbaked pie shell 

    If using frozen pie shell, use only deep dish style and thaw completely. Place on cookie sheet; bake 10 minutes longer. 

    Preheat oven to 325°F. In large bowl, beat eggs until foamy. Add flour and both sugars. Beat until well blended, and blend in melted butter. Stir in chocolate chips and nuts. Pour into pie shell. Bake at 325°F for 1 hour. Serve warm with whipped cream or ice cream. Makes 1 pie.

    NOTES: Every one's oven is different. This recipe called for a baking time of 1hr. My pie was done in 50 minutes. The top may start to brown much quicker than the inside, therefore I suggest covering the top with foil for the last 10-12 minutes of bake time.
    I think you can add anything to this pie--whatever floats your boat. I.E. Snickers, Butterfingers, Toffee Bits, Toasted Coconut. You can't go wrong with any combination! Also, if I had more time, I think pipping whipped cream around the edges would have been the perfect touch-I'll save that for next time.

    Thursday, April 17, 2008

    FOOTBALL CAKE


    HUT HUT HIKE
     
    It was a co-workers birthday today so of course, as always, I'll use any excuse to bake.  It just so happens that this certain co-worker of mine is an ex NFL pro-bowl quarterback; thus creating a football themed birthday cake. This cake was pretty easy. I made the yellow cake inside from scratch using a basic yellow cake recipe found here. I baked it in a football cake pan that I picked up from my local Michael's (clearly my new favorite store). You can order it through the Wilton site as well--found here. Wilton makes these great novelty cake pans--they have every shape you could possibly want. Anyway, once the cake cooled I made chocolate buttercream, however I made it a bit differently.  I used a 1/2 cup of CRISCO and 1/2 cup of butter rather than all CRISCO. The texture came out perfectly as I was able to create those football-like lines throughout.  I still have so much practice to do with my script. I put candles in the cake and it went over fabulously. Enjoy!
        

    Tuesday, April 15, 2008

    RAINBOW CAKE

    PRACTICE MAKES PERFECT..OR DOES IT?
      
    ******ATTENTION---CLASS UPDATE******
    My Wilton cake decorating course teacher is very adamant about practice. "Practice! Practice! Practice!" is what he repeats several times throughout the class. I got home early from work last night and decided to take him up on it.  Class #2 of cake decorating was to create a cake using a rainbow design.  Before I continue, mark my words, I will NEVER do this again. I was in the kitchen for 4 straight hours from start to finish. (Mind you, the cake only took 30 mins to make, including cook time--yes, I used a box cake for practice-in case you were wondering!). So if you ever feel compelled to make a cake using a rainbow design, make sure you allocate enough time. Please note: I didn't even have enough time to take a picture of the cake before it was attacked because everyone at work pounced on it the moment I stepped in this morning.

    I made a funfetti cake which was super easy.  As the cake was cooling I prepared all of my pastry bags with the appropriate tips.  Using the skills I picked up in class on Sunday, I carefully traced a design of a rainbow using piping gel onto a piece of parchment paper.  Once completed, I put the piping gel design face down onto the cake, then ripped the parchment paper off like a band-aid..and wallah! I then piped the actual rainbow using a star tip and created zig-zag like clouds on the ends. I topped it off with a smidgen of blue decorating sugar crystals.

    I was so sick of using CRISCO as the main ingredient for my frosting, so instead, I used Mangolia's Vanilla Butter Cream recipe.  It was sooooo tasty and delicious despite the 2 sticks of butter required. It tasted EXACTLY like the frosting from Magnolia's Bakery in NYC, which are to die for--literally.  I'm quite pleased with the way my rainbow came out.  Your thoughts?
    I'm looking forward to class #3...

    Monday, April 14, 2008

    BUTTERFLY CAKE

    IT'S COOL TO STAY IN SCHOOL

    My local Michael's store offers 3 levels of cake decorating courses. I thought it would be fun to embark on a little adventure and tackle the art of cake decorating. My first course was last week and the teacher assigned homework. Our homework was to bake and frost a character cake. I chose to do a butterfly. The classes are sponsored by Wilton
    thus being required to purchase EVERYTHING Wilton-related. One word--CRISCO. The standard Wilton Buttercream icing is made with 1 cup of Crisco. Honestly, must we use Crisco this day in age?? Is that really necessary??  I actually gagged a total of 3 times while making the buttercream.  However, being the straight A student that I am, I chose to follow the directions and not use my own buttercream recipe. 
    I think my first cake came out decent. I brought it home and my entire family took forks to it; loving every bite. As for the CRISCO, I'll keep that one to myself..no one has to know.

    Next week we are learning how to make clowns and roses. Stand by...

    BLUEBERRY LEMON LOAF

    BLUEBERRY LEMON BLISS

    I've been baking a lot of cookies lately and thought I'd change it up a bit this weekend. I had plans to head home to my parents house on Sunday for brunch and wanted to bring something that would appease my father's taste buds. My father is a very unusual character when it comes to desserts and sweets. More often than not, he will eat dessert before he eats his main course. The man LOVES his chocolate--what can I say.  Apparently the "love for chocolate and sweets" gene was passed on to me, however, his fast metabolism wasn't. Thanks Dad--I really appreciate it.  

    I wanted to make some sort of loaf/cake that didn't involve the addition of icing or chocolate and something suitable for brunch. Smitten Kitchen,  another one of my favorites, was showing, what she called, a Lemon Yogurt Anything Cake. This recipe is originally adapted from Ina Garten and the moment I saw it involved lemons, I was interested. This was the most moist (hi Chris!) cake I've ever made and the combination of blueberries and lemons are so perfect for this cake. I'm always first to use sour cream with these type of cakes but the yogurt was just as, if not more, delicious. Deb, of Smitten Kitchen, suggests a variety of different ways to make this cake. You can check out the recipe here. Enjoy!

    Thursday, April 10, 2008

    KANDI SWIM


    SOMETHING TO CHEW ON...

    I was fishing around the internet and came across KandiSwim.  This is a bathing suit company inspired by cupcakes, ice cream sundaes, milkshakes, etc. Clearly the people who eat all of the afformentioned sweets are most likely not prancing around in these teeny bikinis, however, I guess these models choose to wear desserts rather than eat them. I have my eye on the cupcake bikini--it will be perfect for my Florida getaways! Anyway, I thought I'd share it with you.  It's so cute...check it out!

    Wednesday, April 9, 2008

    GIRL SCOUT COOKIE SAMOA CHEESE TART


    SAMOA CHEESE  TART


    Who doesn't love Girl Scout cookies? My best friend Ariel and I go absolutely crazy for Girl Scout cookie season (mainly,Samoa's).  Since the kids never seem to migrate to my area, I have to actually go to the Girl Scout cookie wear house to purchase them.  I always end up putting them in a drawer in my freezer and completely forgetting about them. While doing a spring cleaning of the fridge, I found 4 sealed boxes of Samoa cookies. I immediately went to the net to search for a plausible recipe. I came across a Samoa cheese tart recipe, compliments of one of my most favorite blogs, Sticky,Gooey,Creamy,Chewy (Check it out!). This recipe includes the likes of mascarpone cheese, dulce de leche and toasted coconut--in other words, I was sold. This tart is super sweet; satisfying every craving I ever have! Enjoy..

    DIRECTIONS:
    1 box Samoa cookies
    3 tbsp. butter, melted
    1 8-ounce package cold cream cheese
    1 8-ounce container cold mascarpone
    1/4 cup granulated sugar
    2 cups dulce de leche, divided
    1 cup flaked coconut
    4 ounces bittersweet chocolate, melted

    Process the cookies into crumbs in the food processor. If you don't have a food processor, put them in a plastic zipper bag and beat the hell out of them until they turn into crumbs. Mix the crumbs with the butter in a bowl. Press the crumbs into a 9 or 10 inch tart pan, preferably one with a removable bottom. Chill for at least 30 minutes.

    In another bowl, combine the cream cheese, mascarpone, sugar and dulce de leche. Beat on medium speed until well-blended, about 2 minutes. Pour filling into tart shell and chill for at least 2 hours.

    Meanwhile, toast the coconut by heating it in a small skillet over medium to medium-high heat, tossing it often so it doesn't burn. When the coconut is golden brown remove from heat and set aside to cool.

    When tart is thoroughly chilled, spread the remaining cup of dulce de leche over the filling, gently spreading it to cover. Be careful not to mush the filling. Spread the toasted coconut over the dulce de leche and drizzle with the melted chocolate.

    Monday, April 7, 2008

    BLACK & WHITE COOKIES

    BIG CITY BLACK AND WHITES

    I have two requirements when it comes to noshing cookies-1)big and 2)fat. While perusing the cooking/baking section at my local book store a few weeks ago, the book 
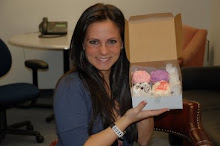
"BIG FAT COOKIES" by Elinor Klivans clearly caught my eye. The pictures are fantastic and the recipes have proved to be quite manageable.  These black and whites contain lemon rind which give the cookies an extra kick.  I had a lot of time on my hands so I wrapped them in cellophane and topped them off with ribbon.  I'll pass these out at work tomorrow where I'm sure they'll disappear before noon.


    DIRECTIONS:

    For Cookies:
    1 3/4 cups unbleached all-purpose flour
    1/2 teaspoon baking powder
    1/2 teaspoon baking soda
    1/4 teaspoon salt
    1/2 cup (1 stick) unsalted butter-at room temperature
    3/4 granulated sugar
    1 teaspoon finely grated lemon zest
    2 large eggs
    1 teaspoon vanilla extract
    1/4 teaspoon almond extract
    1/2 cup buttermilk (any fat content is fine)-I used Light Buttermilk

    For Chocolate Glaze:
    1/3 cup heavy whipping cream
    4 tablespoons (1/2 stick) unsalted butter, cut into pieces
    3 tablespoons light corn syrup
    1 cup (6 ounces) chocolate chips or chopped semisweet chocolate
    For White Glaze:
    2 cups powdered sugar
    3 tablespoons plus up to 2 teaspoons hot water if necessary
    1 teaspoon light corn syrup
    1/4 teaspoon of almond extract

    Position a rack in the middle of the oven. Preheat the oven to 350 degrees F. Line a baking sheet with parchment paper and butter the paper.

    Make the cookies. IN a medium bowl, stir the flour, baking powder, baking soda and salt together;set aside. In a large bowl, using an electric mixer on medium speed, beat the butter sugar, and lemon zest until smooth and slightly lightened in color, about 1 minute. Stop the mixer and scrape the sides of the bowl as needed during mixing. Beat in the eggs, vanilla, and almond extract until blended, about 1 minute. ON low speed, mix in half of the flour mixture just to incorporate it. Mix in the buttermilk, blending completely. Mix in the remaining flour mixture. Using an ice cream scoop or measuring cup was 1/4-cup capacity, scoop mounds of the dough onto the prepared baking sheet, spacing the cookies at least 2 1/2 inches apart. Bake the cookies until the edges and bottoms are lightly browned and a toothpick inserted in the center comes out dry, about 14 minutes. Cool the cookies on the baking sheet for 5 minutes, then use a wide metal spatula to transfer them to a wire rack to cool completely.

    Make the chocolate glaze:
    In a medium saucepan, heat the cream, butter, and corn syrup over medium heat until the mixture is hot and the butter melts; do not let boil. Remove the pan from the heat and add the chocolate chips. Let the chocolate melt for about 30 seconds, then stir until all of the chocolate has melted and the glaze is smooth. Let the glaze cool until it thickens enough to cling to the cookies, about 30 minutes.

    Make the white glaze:
    When ready to glaze the cookies, in a medium bowl, stir the powdered sugar, 3 tablespoons of the hot water, corn syrup, and almond extract together to make a thick, smooth, pourable glaze. If necessary, continue adding hot water by the teaspoon to reach the desired consistency.

    Turn the cookies so the flat bottom sides are up. Spoon about 1 tablespoon of white glaze on one side of what is now the top of a cookie and use the back of the spoon to spread the glaze evenly over half of the cookie. (If the glaze thickens as you work so it does not spread easily, add a few drops of water.) Repeat with the remaining cookies. Spoon a generous 1 tablespoon of chocolate glaze over the bare half of each cookie, spreading it evenly over that half of the cookie. Some glaze may drop over the sides, and that is fine. Refrigerate the cookies to firm the glaze.

    Wrap each cookie in plastic wrap and refrigerate. Serve cold or at room temperature. The cookies can be stored in the refrigerator for up to 3 days.