Friday, December 25, 2009

RAINBOW COOKIES!!!!!

Oh..my...god!! I did it! I did it! Rainbow cookies are something I always wanted to challenge myself with and I finally gathered up the courage to do so...and it took 48 hours! Woo hoo!

Rainbow cookies have been my absolute favorite for as long as I could remember. Seven layer cookies, as they are also called, contain rich almond cake layers sandwiched with apricot or raspberry jam and topped off with a hard chocolate shell. New York is known for these cookies and they are hard to find elsewhere in the country. As most of you know, I have relocated down south to Memphis, TN for the time being and for the life of me, I can't find any rainbow cookies. My problem was solved when I decided to make them from scratch.
I had heard that the act of making rainbow cookies isn't so much difficult as it is time consuming--and I heard correctly. You need a solid 2 days to make these cookies between the chilling, the sandwiching, etc and let me tell you, it is worth every second. The cake layers are super easy to make, requiring almond paste, amongst other basic cake ingredients. The batter is separated into three separate bowls, each being colored red, green, and one left plain white.
In my case, apricot jam is heated and strained and then spread between each layer. A baking pan is used to weight the layers overnight and then the chocolate layer is spread on the top and the bottom to finish off the cookies. After reading many reviews, I froze the completed, unsliced cookies for several hours before slicing them with a chef's knife dipped in hot water. This method worked perfectly and none of the chocolate cracked on top. I cut them into thin slivers which produced several dozen. You can choose to cut them into 1 inch squares as well, however, traditionally these cookies are served in thin rectangles.

I encourage you all to try your hand at this recipe at least once in your lifetime! It's not as difficult as it seems and if you have the time to spare, go for it! Next time I think I will go with raspberry and apricot jam in between the layers.

Check out smitten kitchen's recipe for these cookies found here.

REESES PEANUT BUTTER CUP CHEESECAKE

Wow, I've been making a ton of cheesecakes lately. There's nothing like digging your fork into a cold, creamy cheesecake with a crunchy crust. It's official, cheesecake is by far my most favorite dessert. I love to make them and I love eating them even more!

My boyfriends brother celebrated a birthday a few weeks ago and rather than baking your traditional classic birthday cake, I went with a Reeses peanut butter birthday cheesecake. This cheesecake was unreal. The peanut butter flavor wasn't overly strong and the Oreo cookie crust made for a perfect cheesecake foundation. The chocolate ganache layer on top really put this cheesecake over the edge as my most favorite cheesecake, to date.
This recipe fills is designed to fill a 10 inch springform pan, however, I only had a 9 inch so I had some extra batter leftover which I used to make mini peanut butter cup cheesecakes. Since my boyfriends family are die-hard Tennessee Volunteer fans, I stuck these cute little Vols picks in each mini. They were a huge hit.

Please note that you should plan a day ahead when making this cheesecake. It requires a lot of chilling time and I always find that leaving a cheesecake to chill in the fridge overnight produces the best results.

For The Crust

For The Filling

For The Topping

5 ounces milk chocolate chips
1/4 c. sour cream
  1. Please Note****Plan ahead--cheesecake needs to chill for at least 4 hours.
  2. To Make The Crust:.
  3. Combine crushed Oreo cookies and peanuts that have been ground in a food processor with the melted butter.
  4. Pat the crust mixture onto bottom and sides of a 10-inch springform pan.
  5. To Make The Filling:.
  6. Beat cream cheese in bowl of electric mixer until smooth.
  7. Add eggs, one at a time, beating well after each addition.
  8. Add sugar, peanut butter and cream; mix until smooth.
  9. Stir in vanilla, then fold in peanut butter cup pieces with a rubber spatula.
  10. Pour filling into prepared crust.
  11. Place springform pan into a larger baking pan.
  12. Pour hot water into the larger pan so that the water comes 1 inch up the sides of the springform pan.
  13. Bake at 275°F 1-1/2 hours, or until firm and lightly browned.'
  14. Remove from oven and allow to cool on a wire rack for one hour
  15. you may run a knife along the edge of the cake to loosen it from the pan somewhat.
  16. Refrigerate for at least 4 hours (overnight is your best bet)
  17. For The Topping:.
  18. In a saucepan over low heat, melt the chocolate and sour cream, stirring constantly. Spread over cheesecake and return it to the refrigerator to set up.

CHRISTMAS GIFT GOODIES

In addition to passing out boatloads of salted cashew chocolate toffee as holiday gifts, I also made Christmas-themed cupcakes and cookies-n-cream fudge to switch it up a bit.
The cupcakes were half carrot cake with cream cheese frosting and half chocolate cake with vanilla cream frosting. The mini cupcakes were decorated with holly's and the regular sized cuppies had decorated candy canes on top. Super cute and incredibly tasty!
Fudge was a major lesson in the first module of my culinary program. While fudge uses very basic ingredients to make, it can be an extremely temperamental process to produce perfect, creamy fudge.
I realized this after it took me 3 times in school to master making delicious fudge. All the temperatures must be exact for cooking and then the cooling process is very precise. Most recipes require the text book step by step instruction to produce a baked good, however, I found a fudge recipe that completely strays from the norm. This cookies-n-cream fudge recipe is most definitely NOT textbook and cuts all the corners to produce perfectly creamy, half the labor, fudge. Where did I find this, you ask? Nestle's Very Best Baking site. Yep, who would have thought! As long as this post never finds its way back to my module 1 chef instructor, I should be alright. This recipe is simplicity at its best. When there's a will, there's a way...

Ingredients:

Directions:

LINE 9-inch-square baking pan with foil.

COMBINE sugar, butter and evaporated milk in medium, heavy-duty saucepan. Bring to a full rolling boil, stirring constantly. Boil, stirring constantly, for 3 minutes. Remove from heat.

STIR in morsels, marshmallow crème, finely crushed cookies and vanilla extract. Pour into prepared pan. Sprinkle crumbled cookies on top. Gently swirl cookies into fudge using a knife without touching bottom of pan. Refrigerate for 1 hour or until firm. Lift from pan; remove foil. Cut into 48 pieces. Store in airtight container in refrigerator.

CLASSIC CHOCOLATE BROWNIES


I've been food blogging for several years and I'm always seeing various quests for the "perfect brownie". Of course, this is by personal taste because everyone likes their brownies different. Well, if you are at all like me and seek the ultimate brownie to have a cakey yet fudgy interior with a flawless light and flakey exterior than look no further. I have been making Nick Malgieri's Supernatural brownies for years on end and no one can convince me otherwise to make another variation. These brownies have it all. Compared to most other brownie recipes, Nick's brownies contain much less flour allowing for an ultimate burst of chocolate flavor. They are moist and fudge-like but hold a cake-like structure so they don't fall apart to the bite. They are extremely versatile and I've dressed them up with numerous fix-ins such as peanut butter, Andes mints, chocolate chips, and what have you. Trust me people, these are a winner.

Click here for recipe.

PUMPKIN CHEESECAKE

This post is way overdue. Believe it or not, this amazingly delicious pumpkin cheesecake was made for Thanksgiving. That's a clear indication how far behind I am, however, the salted cashew chocolate toffee below was from Thanksgiving as well. So, slowly but surely, I'm getting there.

I make this cheesecake every year for Thanksgiving and it has become a staple dessert for years to come. I go for a slice of this before the pecan pie which says a whole lot about this cheesecake. The crust is crushed up gingersnap cookies followed by a creamy maple pumpkin filling and topped off with a brown sugar glaze. The crust to filling to glaze components are perfectly in sync for a blast of delicious flavors in each bite. This truly is my most favorite cheesecake out there and it can be made all Fall through the Winter---not just for Thanksgiving. Enjoy!

INGREDIENTS:
1 1/2 cups gingersnap cookie crumbs
3/4 cup ground hazelnuts (feel free to eliminate)
3 tablespoons brown sugar
6 tablespoons unsalted butter, melted
3 (8 ounce) packages cream cheese,
softened
1 cup brown sugar
1 1/2 cups canned solid pack pumpkin
1/2 cup heavy cream
1/3 cup maple syrup
1 tablespoon vanilla extract
3/4 teaspoon ground cinnamon
1/2 teaspoon ground allspice
4 eggs
DIRECTIONS:
.
1.Preheat oven to 325 degrees F (165 degrees C). Grease and flour a 9 inch springform pan.
2.Using a fork, combine gingersnaps, hazelnuts, 3 tablespoons brown sugar and melted butter. Press mixture onto the bottom and two inches up the sides of the pan to form the crust.
3.With an electric mixer, beat cream cheese and brown sugar until light and fluffy. Stir in the pumpkin. Mix in the cream, maple syrup, cinnamon, allspice and vanilla. Beat in the eggs, one at a time, mixing until smooth.
4.Pour batter into prepared crust. Bake in the preheated oven for 90 minutes, or until center of cheesecake is set. Allow to cool in pan for 30 minutes then refrigerate overnight.

Monday, December 14, 2009

SALTED CASHEW CHOCOLATE TOFFEE

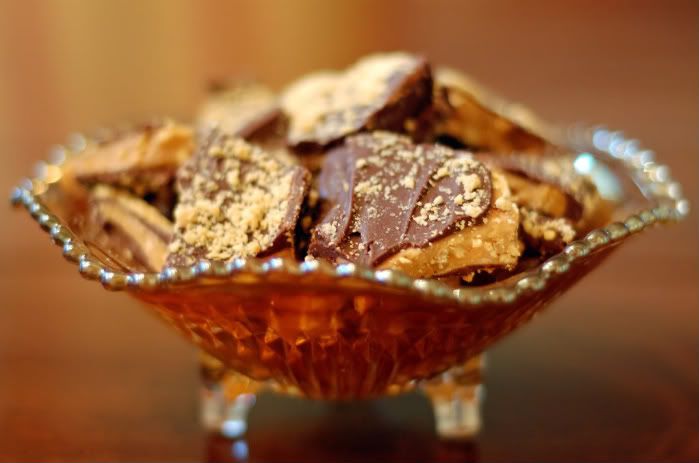
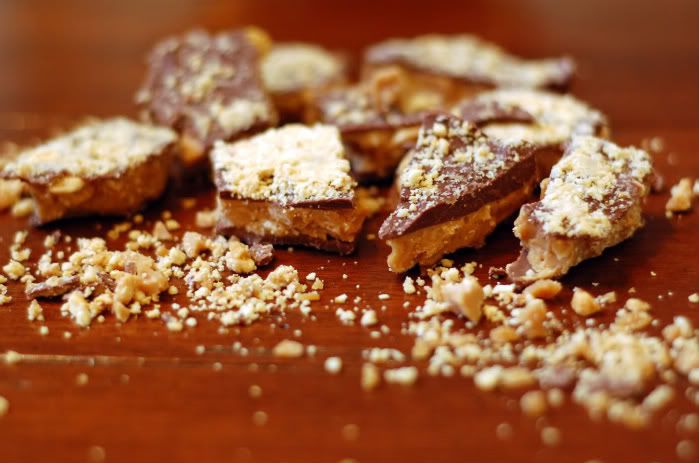
Homemade heath bar crunch, if you will--with a little twist. I feel truly guilty for this post. Let me just get that out in advance. Now is your chance to "X" my website out and revisit at a later date; preferably when this post is no longer viewable on the home page. Don't say I didn't warn y'all. Why am I so concerned with your well being, you ask?This salted cashew chocolate toffee is addicting, fattening, waist- swelling, crack. It's chocolaty. It's salty. It's nutty. It's crunchy. It's four million calories and it's worth every single bite.
Of course, if you're not a fan of cashews, you could always go down the traditional route of almonds or even peanuts. Any nut works in this instance--trust me, I've tried them all; take my word for it. If you have absolutely no reason to bring this deliciousness into your household; here's one: make a boatload of these as holiday gifts for your family, co-workers, friends, etc. It may not be a great excuse to stuff your face with them but, however, it is an excuse. I'm just trying to help you out. Seriously, proceed with caution :)

Click here for recipe.

Tuesday, December 1, 2009

CARAMEL APPLE PIE BLISS

Ok, seriously..this is one of, if not the, best pies I've ever had in my life! A buttery flaky crust meets a cinnamon-spiced apple filling, studded with hunks of gooey, slimy, sweet caramel. Oh my...just the very thought of a slice of this apple goodness is causing a serious build-up of drool! I must stop. This pie is perfect. Ok, I'm done...

Here's the recipe. Make this, ASAP!

CHOCOLATE CHIP COOKIE CAKE

How cute is this? Chocolate chip cookie cake. Turkey decoration. Need I say more? Well, actually..one more thing: it was "gobbled" up in seconds. True story.

Use your most favorite chocolate chip cookie recipe and double it to make a thick 9 inch round cake and if you're reallyyyyyy lucky, you may have some dough left over to sneak in a few cookies. Enjoy!

SUGAR COOKIES

Welcome back from the seemingly endless holiday of stuffing face! Good news folks, this is only the beginning. Bring on the December holidays as Thanksgiving was merely a warm-up round.
Anyway, on to these cookies. As you can see from my earlier post on the University of Tennessee sugar cookies, I've been on quite a sugar cookie roll. They are super easy to make, fun to decorate, and even more delicious to eat. My boyfriend's company had a big Thanksgiving party so I sent him in with this absolute random selection of cookies; schnauzers, mittens, leaves, and bones. Yep, you know, the usual. I'm not sure what I was thinking when I pulled these 4 cutters from my bag of 1000 but there's nothing wrong with some arbitrary selection from time to time! I wrapped each cookie in a plastic bag with some cute ribbon and got incredible feedback. All 150 cookies were gone within an hour! I also sent him in with about 75 pumpkin spice cake pops but really...haven't y'all had enough of the cake pop posts? I've opted to leave those pictures out and save you from cake pop bombardment. :)

Saturday, November 21, 2009

ICE:APPLE

This month's Iron Cupcake Earth challenge was dedicated to...what else? Apples! Apples are so incredibly versatile in the world of food and can be sweet or tart, cider or vinegar, wine or soda, and butter or jelly. Take your pick, any pick..they are all delish! I went ahead and created an apple ginger spiced cupcake topped off with a spiced cream cheese frosting and garnished with a homemade mini gingerbread man. Too cute; and did I mention finger-lickin' good?
Each cupcake was filled with chunks of sweet spiced apples which made for a perfect Fall treat. The combination of a sweet and spicy cupcake with a creamy cream cheese frosting created the perfect trifecta! I really can't get enough of these cupcakes and neither could my boyfriend's colleagues! Here's a closer look at the anatomy of this cuppie:
With all this said, please vote for me for this month's Iron Cupcake Earth challenge!! Voting takes place on Friday November 27th @ 8pm at No One Puts Cupcake In A Corner and will be open through Thursday December 3rd @ noon. Go on, don't be shy :)

Friday, November 13, 2009

GO VOLS!!

I'm off to the Tennessee vs. Ole Miss football game tomorrow in Oxford, Mississippi! My boyfriend was a player on the U of Tennessee football team several years ago so naturally, he is a die-hard fan! Mississippi is only about an hour from Memphis and we are leaving super early to tailgate. There's nothing like smash mouth SEC football. This rivalry should be great.
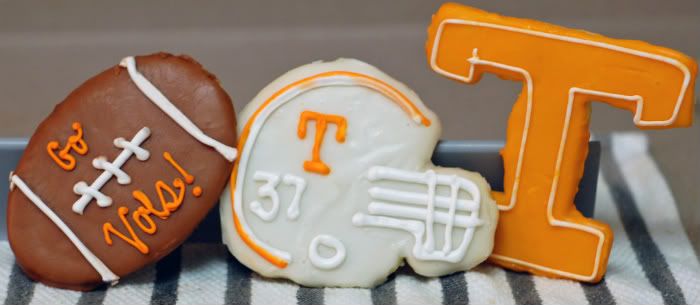
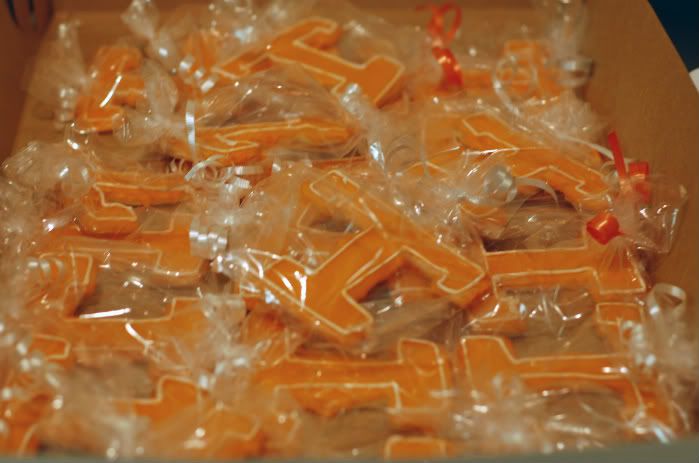
Since the tailgate is consisting of over 100 people, I thought it would be a nice touch to bring Tennessee Volunteer decorated cookies including a football, helmet, and "T" logo. I made about 6 dozens of these today using a basic sugar cookie recipe. All of the cookies were dipped in icing and decorated with royal icing. These were super fun to make and tasted so delicious. I individually wrapped each cookie and topped the baggies off with orange and white ribbon. I hope everyone enjoys them tomorrow at the tailgate! GO VOLS!!

Tuesday, November 10, 2009

TWD: SUGAR-TOPPED MOLASSES SPICE COOKIES

The month of November was a great time for me to rejoin my beloved Tuesdays With Dorie baking group; and because November is such a crazy time with the holidays, the members can bake any of the 4 recipes selected for November and post on whichever Tuesday they please. With that in mind, I decided to start off with these cookies. I've been inundated with cakes, cupcakes, and pies the last month or so that I really missed the operation that is cookie baking!
Pamela of Cookies with Boys chose these cookies for November 17th, so be sure to keep your eyes peeled for the recipe that will be posted on her blog. These cookies were tremendous and by tremendous I mean tremendously delectable. They had a sugary crunchy top with a semi-soft center and a spiced molasses flavor that was to die for! All the cookies baked perfectly uniform and were super easy to make. I doled out half of the batch for noshing and the other half to be ground up as a crust for my pumpkin cheesecake that I will be making later this week. Thanks for a great selection, Pamela!

Sunday, November 8, 2009

FALL YUMMIES

Hi there. I know, I know. I keep making promises that I can't keep. I keep disappearing without any notice. I'm neglecting you. It's wrong. Will you forgive me? Give me another chance? I promise to be the blogger you deserve! I've gone MIA once again but with very good reason!! You see, the very last module of my culinary program involves a 210 hour internship to be completed practically anywhere in the country; based on your future food industry aspirations. Practical experience in the food biz is so incredibly important. In my case, a small bake shoppe is what gets my wheels turning, so I chose this fantastic little mom and pop bakery in Memphis, TN. Yes, you heard correctly...Memphis! As random as the home of pulled pork may be, my boyfriend lives there so it was a no-brainer! Needless to say, the past few weeks have been madness between shlepping my dogs on an 18 hr car ride, setting up a new place to live, getting my bearings adjusted, and catching up on much needed sleep. OK, y'all? I'm working on my southern drawl, so bear with me. I've digressed a tad from my original reason for posting and that reason is Fall deliciousness!! Think pies, pumpkin, a world of delicious spices, and...wait for it...BBQ!(I joke, I joke). Over the last few weeks I made some delicious goodies and let me tell you; my boyfriend's co-workers are psyched that I've become a Tennessee resident :) See for yourself...

  • Ghost Petit Fours- pumpkin spice cake baked on a sheet pan cut into 1 inch circles, piped buttercream, and smothered in a buttery icing glaze. Black decorating gel used for the eyes and mouth. Super cute and super tasty! Recipe and how-to found here.
  • Mini chocolate cupcakes with orange cream cheese frosting- The "BOO" was made by smearing chocolate icing on the back of 1/2 an Oreo cookie and piping on top. I used Martha's One Bowl chocolate cupcake no-fail recipe. Cream cheese frosting recipe found here.
  • Pumpkin pie with gingersnap pecan crumble- I got this recipe off the cover of the November Southern Living issue. I can't find the recipe online yet, however, I will post as soon as it becomes available. This pie had a flaky pie crust followed by a gooey gingersnap layer with a spiced up pumpkin pie filling. It was topped off with a gingersnap pecan crumble and homemade whipped cream. Beyond delicious.

Monday, October 19, 2009

001_ICE 2.0-MUSIC

Welcome back to the 2nd year of Iron Cupcake Earth where the first challenge of the year is music! Iron Cupcake is trying to get onto the Ellen show and since Ellen Degeneres has such a love for music, this first challenge is dedicated to her. Therefore, we were given the opportunity to pick any song and develop a cupcake around the title. In my case, I went with "October" by U2. Fitting? I thought so.
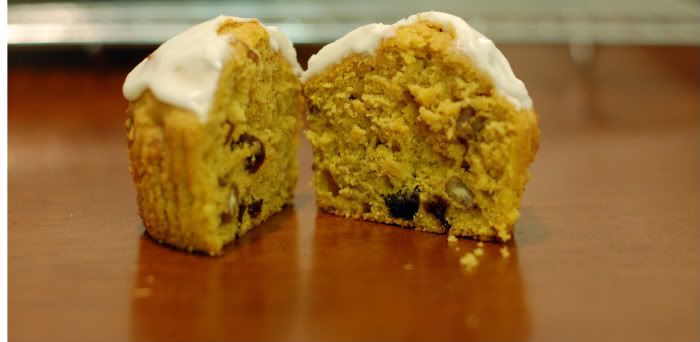
What you see here is a pumpkin muffin bursting with plump raisins and chopped pecans. The muffin was moist and cake-like with just enough hint of cinnamon, all spice, ginger, and nutmeg. The raisins and chopped pecans added more flavor and crunch. I topped each muffin off with a cream cheese glaze and garnished with a pecan half.
This pumpkin muffin recipe came from Dorie Greenspan's: Baking From My Home To Yours bake book. I would most certainly make these again. Bring on the pumpkin season!

Be sure to vote for my "musical" Iron Cupcake submission on Friday October 30th at No One Puts Cupcake In A Corner. Voting will be open through November 5th.

Pumpkin Muffins
From Baking: From My Home to Yours by Dorie Greenspan

Makes 12 regular sized muffins or 6 jumbo muffins

2 cups flour
2 tsp baking powder
1/4 tsp baking soda
1/4 tsp salt
3/4 tsp cinnamon
1/2 tsp ginger
1/8 tsp freshly grated nutmeg
pinch allspice
1/2 cup unsalted butter
1/2 cup granulated sugar
1/4 cup brown sugar
2 large eggs
1/2 tsp vanilla
3/4 cup canned unsweetened pumpkin puree (NOT pumpkin pie filling!)
1/4 cup buttermilk
1/2 cup plump raisins (soak in hot water first if yours seem too dried out) (optional)
1/2 cup chopped walnuts or pecans (optional)
unsalted raw sunflower seeds, for sprinkling on top (optional)

Preheat oven to 400F / 200C. Grease your muffin tin or fill it with paper muffin cups (unless you're using silicone bakeware, which needs no greasing).

In a small bowl combine the flour, salt, baking powder, baking soda and spices.

Using a stand mixer with the paddle attachment or an electric hand mixer, cream together the butter and sugars until light and fluffy. Add the eggs one by one, beating and scraping down the sides of the bowl after each one, then add the vanilla. Lower the mixer speed and add the pumpkin and buttermilk.

With the mixer on a low speed, add the dry ingredients. To avoid over mixing, I tend to have the mixer on for only a couple of seconds when adding the dry mixture, then to turn it off before everything is completely incorporated and finish mixing by hand. Dorie recommends this too! Stir in the raisins and nuts, if using.

Spoon the batter into the muffin tin and sprinkle a few sunflower seeds over each muffin, if using. Bake in the center of the oven for 20-25 minutes (mine were done in 18 mins), until a knife inserted in the center comes out clean (jumbo muffins will take longer).

Cream Cheese Glaze
1 8-ounce package cream cheese, room temperature
1/2 cup sour cream
2 cups confectioners sugar

In the bowl of a standing mixer fitted with the paddle attachment, at medium speed, beat the cream cheese and sour cream until smooth. With the mixer on low speed, add the confectioners sugar one cup at a time. Mix until incorporated. Yield: 2 cups glaze.

Friday, October 16, 2009

PROJECT WEDDING CAKE

It has been exactly 1 month since I've posted. If that's not reflective of how busy my schedule has been, then I'm not really sure what is! You see, yesterday was graduation day! In case you are a first time reader, I've been enrolled in a baking and pastry arts program at a culinary school in Manhattan dating back to last May. As part of my final exam, an individual wedding cake was to be presented at graduation. Well, folks...here it is!

My chef was pretty lenient as to what style wedding/celebration cake each person was to make. Many of my classmates went super modern when it came to decoration and detail. But me? I went down the traditional avenue of wedding cake decoration. My wedding cake was reminiscent of a classic, elegant cake that was the standard for several years before modern cake decorating became the norm. With that said, here is what you're looking at:
-2 tier yellow cake consisting of a 10 inch round and 6 inch round. The 10 inch cake was split into 3 layers all filled with french vanilla buttercream. The 6 inch round was split into 2 layers.
-Each round was covered in fondant which I colored ivory. I used royal icing to make the uniform white dots.
-The rose bouquet and leaves were made out of gumpaste which I petal dusted to give it a realistic effect.
-Each layer was wrapped with a champagne colored ribbon at the bottom.

I took a ton of pictures, so here you go! Your thoughts?


Wednesday, September 16, 2009

RED VELVS

My oh my. I made these puppies for a 30th birthday that I catered last week and let me just say that I doubled the batch on purpose. Yep, these are the best red-velvet-cream-cheese-frosted goodies that you'll ever have in your life! And the best part...? I've finally tweaked my own recipe to be both delicious AND to produce the most magnificent, atheistically appealing red velvet cupcake on planet earth. Now, for the bad news. No recipe postage. I knowwww, I'm sorry. How could I possibly use such enormously descriptive words for a cupcake and then not share love? Well, you see..I've started my own business which means I'll be using all my own recipes that I've been working on perfecting for years. If I were to release such classified information, I might as well get out of this business and become a lawyer..or a kindergarten teacher, or a tennis pro. You understand, right? No grudges, please.
So, with that said; I will still be posting wonderful drool-full pictures as well as recipes..just not my own recipes. I promise there will be plenty to gawk at over at the peanut shell. No worries. Don't hate me :) I got nothin' but love for ya!

Thursday, September 3, 2009

BROWNIE CHEESECAKE TEACAKES

I'm sensing a theme here...hmmm; perhaps a certain little combination pertaining to cheesecake....and, er, brownies? Yep, that's it. I'm addicted. I've been tossing and turning this whole week thinking of ideas for brownie/cheesecake combos. Here's a text message conversation I had with my mother today:

Mom: "Hi! I'm in the city, are you around?"
Me: "Really? I didn't know you were coming in..what are you doing in the brownie?"

Yea? 'Nuff said.
Ever since my much anticipated espresso cheesecake brownie selection; to which I earned real life positive feedback from THE Dorie Greenspan herself, I've been inspired to create interesting and fun cheesecake/brownie collaborations. I'd say these brownie cheesecake teacakes fall under that category quite nicely.
My boyfriend's father's birthday is tomorrow and I thought it would be nice to bring along these teacakes. You see, he has very little to no sweet tooth whatsoever, so I wanted to choose something that, at the very least, would be tasted due to the unique manner in which it's baked; because, who wouldn't want to taste a rich chocolate brownie with a surprise center of vanilla creamy cheesecake with creamy chocolate ganache on top? Yes, please!
These were fantastic. I used the same recipe as I did when I made the actual bar version of this recipe a while back, only these were baked in a teacake pan which I've been dying to utilize. Since the top of a "teacake" has that indentation, the cheesecake was put on the bottoms and baked its way through the cake. The outsides baked crispy while the insides were moist and creamy. I topped each teacake with a rich whipped chocolate ganache aiming for a "flower" look and placed multi-colored candies in the center. I arranged these in a beautiful shoebox that I've been holding on to for a while (it's a great lime green!) and wrapped it with beautiful ribbon. Go on and treat yourself--make these, stat.

Wednesday, September 2, 2009

BLUEBERRY CHEESECAKE CRUMB BARS

Ain't that a mouthful? Oatmeal raisin cookie crusted vanilla bean blueberry cheesecake crumb bars. Whoa. And that was the exact reaction they received, whoa. I went ahead and made this recipe up, from scratch, consisting of all my most favorite flavors and combining them into one crunchy, creamy, sweet, fruity taste all in one bar. Lets review:

Favorite Cookie? Oatmeal Raisin. Check.

Favorite Cold Dessert? Cheesecake. Check.

Favorite Fruit? Blueberries. Check.

Favorite flavoring? Vanilla Bean. Check.

Favorite topping of all time? Crumble. Check.
Get my point? These were the quintessential most sinful dessert on this planet. Just blogging about them is causing drool on the keyboard. I brought these to a BBQ I attended last weekend where the host requested several desserts, including cheesecake. I wanted something fairly simple that didn't make a mess and something that had less of a chance of getting ruined while transporting. I cut them into perfect 1 1/2 x 1 1/2 squares after trimming down all 4 sides. Because I couldn't bear to throw any part of this cheesecake bliss out, I brought the trimmings across the hall to my neighbors, who, renamed these guys "blueberry magic". Magical would be an understatement.

Unfortunately, I cannot give this recipe out because I truly believe it could be a staple dessert for my business! However, use your imagination and I'm sure you can simulate you're own kind of unique magic. :)

1ST BIRTHDAY CAKE

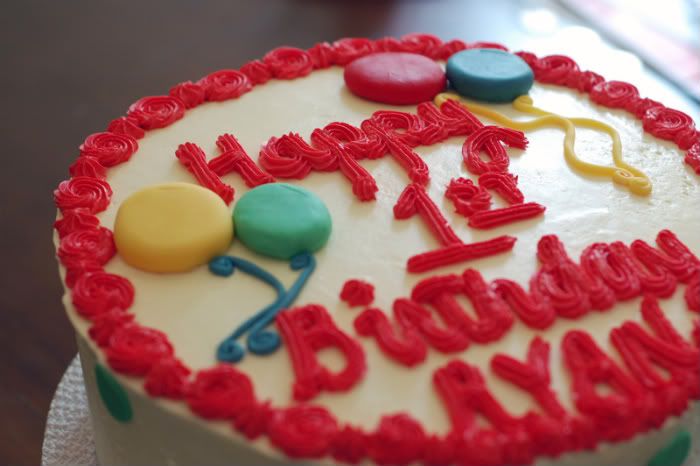
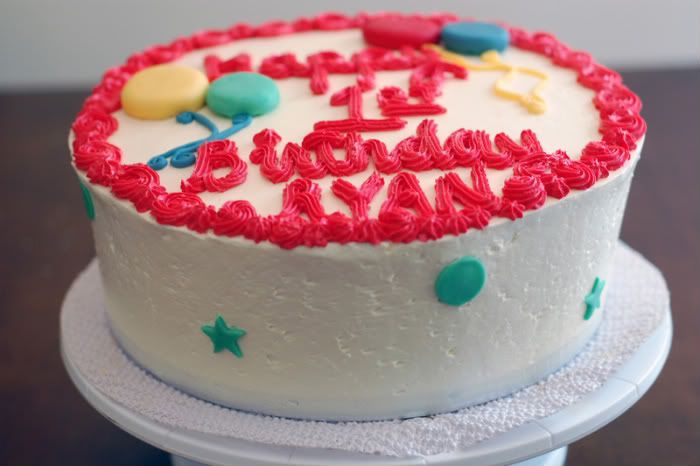
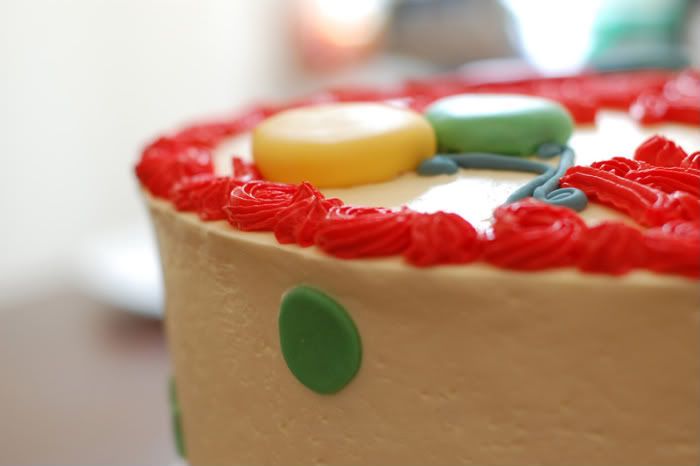
This 1st birthday cake was for another one of my clients; super light and springy white cake filled with a vanilla bean buttercream and decorated with multicolored fondant covered sable cookies. Wallah, hopefully a very memorable 1st birthday cake, indeed. I knew I really had to make this cake special and super childish because after all, 1st birthday's are ones that will be cherished forever! The cake is by far the most important part.
This cake was absolutely enormous weighing in at close to 25lbs! It consisted of 3-10 inch layers all smothered with rich swiss meringue buttercream and I sure as heck wasn't worried that it wouldn't feed a total number of 25 people at the birthday party. I baked dozens of chocolate and vanilla sable cookies which were shaped exactly like balloons, so I covered each one in a different color fondant and rolled some fondant into "string-like" structures as the base of each balloon.
Like I stated in the previous post, if you are interested in special occasion cakes, cupcakes, cheesecake, pies, cookies, brownies, and what have you--email me!

My business website is under construction and should be up and running soon. In the meantime, my blog is a great way to display my work until further notice. Thanks :)

BABY SHOWER CUPCAKES

These cutie blue cuppies were made for one of my clients and, as you can see, were meant for a baby shower. I went with simple golden yellow mini cakes topped with a vanilla swiss meringue buttercream, blue and white non pareils, and a sugared blue rattle. I filled each cupcake with a dollop of homemade cookie dough which I froze the night before so they'd bake gooey and delicious.
These were the perfect favor for a baby shower; simple yet elegant and most importantly, tasty! If you would like to order special occasion cupcakes, feel free to email me!

Monday, August 31, 2009

TWD: ESPRESSO CHEESECAKE BROWNIES

Wow. It has been well over a year since I first joined the lovely interactive baking group; Tuesdays With Dorie, and my day has finally come...the recipe rotation gods have spoken! It's my week to choose a recipe from Dorie Greenspans, "Baking: From My Home To Yours" and my opportunities of choice seemed endless. There were pies, tarts, cookies, cakes--oh so many I could have selected without batting an eye. However, when my eyes scanned page 104-105; it was love at first site. Espresso? Brownies? Cheesecake? All in one?--I had to plea no contest.
These brownies were absolutely delicious. Each creamy, espresso-spiked, chocolaty, brownie bite got better and better as my consumption continued...and continued...and (we all know how this story ends) resulted in my dinner for the evening that left me with a sugar hangover. And a worthy hangover at that.

Rather than the suggested 9X9 square pan I baked these guys in a 9 inch round pan and sliced them in thin wedges. Chocolate chunks, dark chocolate covered espresso beans, cappuccino chips, cocoa powder, and a chocolate wafer cigar were among many of the toppers. Please please pleaseeee make this if you haven't already. They are a great end-of-the-summer cool treat for season ending BBQ's! Labor Day, anyone? You're welcome.

Espresso Cheesecake Brownies
From Dorie Greenspan's Baking From My Home to Yours

For the brownies:

1/2 cup ap flour
1/4 teaspoon baking powder
pinch of salt
5 tablespoons unsalted butter, cut into cubes
4 ounces bittersweet chocolate, chopped
1/3 cup sugar
2 large eggs
1/2 teaspoon vanilla extract

Preheat the oven to 350 F, with a rack in the center. Butter a 9" square baking pan placed on a baking sheet and set aside.

To make the brownies:

Whisk together the first three ingredients. Put the butter and chocolate over a double boiler with water simmering. Stir until the ingredients melt, but don't overheat so that the butter separates. Remove the top of the double boiler and set aside.

Stir the sugar into the chocolate mixture with a whisk, then add the eggs one at a time. Beat well after each egg, then beat in the vanilla. Next, gently stir in the dry ingredients until they disappear. Set aside.

For the cheesecake:

1 1/2 teaspoons instant espresso powder dissolved in 1 tablespoon boiling water
8 ounces cream cheese, at room temperature
2/3 cup sugar
1/2 teaspoon vanilla extract
2 large eggs
1/4 cup sour cream
1 tablespoon ap flour

Allow the espresso to cool to tepid. With a stand mixer fitted with the paddle, beat the cream cheese on medium until it's completely smooth. Add the sugar and continue to beat for 3 minutes more. Beat in the vanilla and espresso before adding the eggs one at a time. Beat for 1 minute after each egg, then reduce the speed to low and add the sour cream, then the flour. The batter should be smooth.

Pour about 3/4 of the brownie mixture into the prepared pan. Smooth it out, then pour the cheesecake layer over the top, taking care to make it even. Place spoonfuls of the rest of the brownie batter on top, and use a knife to swirl the dark and light batters together. Be careful, however, not to plunge the knife into the base brownie layer. Swirl only as much as necessary.

Bake for around 30 minutes. The brownies should come away from the sides of the pan. The cheesecake will puff and turn lightly browned around the edges. Transfer the pan to a wrack to cool. Once it reaches room temperature, refrigerate for at least 2 hours, until well chilled.

For the topping:

1 1/4 cups sour cream
1/2 cups confectioners' sugar

Warm the sour cream and sugar in a small saucepan over very low heat. You need to stir constantly until the sugar is dissolved. Pour over the chilled brownies, then return them to the refrigerator and chill for at least another hour. Cut the brownies into squares and serve.