Tuesday, February 2, 2010

KIDDIE CUPCAKES

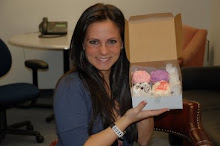
I made these adorable cupcakes for a dinner party I was invited to on Sunday. The host's have two young children; a 2 year old girl and a 5 year old boy and I knew I wanted to theme my dessert cupcakes around these cuties.
Both sets of cupcakes consisted of cream-filled double chocolate fudge cake topped with either:
  • pink buttercream, a dusting of pink sanding sugar, and a Valentine colored M&M for garnish (obviously these were appropriately decorated for the little girl)
  • chocolate fudge icing with a dollop of vanilla buttercream and assorted colored fondant cut out circles for garnish (aimed at appealing a young boy!)
These were SUCH an incredible hit! There was a perfect ratio of cake to cream filling to buttercream for each cupcake! Enjoy.

Monday, January 25, 2010

BLACK 'N WHITE CUTIES

I've begun the "packing up" stage here in Memphis, TN and part of cleaning out my pantries involves baking everything off that I have bought in the last several months here. I have no room in my car to ship everything back up to NY and besides, my two 80lb dogs deserve all the room they can get. After all, it is a close to 20 hour drive back up North. Therefore, I made it my duty to use up all the ingredients, chocolate, canned items, etc that existed in my kitchen, bake it off, and donate it to charity. One of the many varieties of goodies I donated were these cute black-n-white cuppies.
All of them were mini chocolate cupcakes stuffed with vanilla cream and topped with a variety of fluffy white cream cheese frosting, chocolate frosting, coconut, and a jumbo chocolate chip. In addition, as you can see, the cuppies donned black and white polka dot liners. Cute!
While many of these cupcakes were donated, I had to pull a couple strictly for tasting purposes only ;)...and the verdict?? Outrageous.

SALTED CARAMEL CUPCAKES

My blogging has clearly slowed in recent months but I plan on picking it up very soon. As most of you know, I've been temporarily living in Memphis, TN since October to complete the last phase of my baking and pastry arts degree (a 210 hour internship at a local Memphis bakery). Well folks, my internship is up and I'm headed back to NY this weekend with tons of new baking tips, business knowledge, and amazing top secret recipes. I'm psyched!
Anyway, on to these cupcakes! I made them a couple weeks ago but because it has been so crazy here, I didn't have much time to post. I've wanted to make Martha's salted caramel cupcakes for quite some time now and I should have never waited this long! These are absolutely delicious; beginning with a one-bowl chocolate cupcake recipe stuffed with ooey gooey homemade caramel, topped with a rich dark chocolate frosting, and some sea salt for good measure. Once the caramel cooled inside the stuffed cupcake, it thickened and made for a perfectly, chewy, candy stuffed chocolate cupcake. Unconditionally delish!

Friday, December 25, 2009

RAINBOW COOKIES!!!!!

Oh..my...god!! I did it! I did it! Rainbow cookies are something I always wanted to challenge myself with and I finally gathered up the courage to do so...and it took 48 hours! Woo hoo!

Rainbow cookies have been my absolute favorite for as long as I could remember. Seven layer cookies, as they are also called, contain rich almond cake layers sandwiched with apricot or raspberry jam and topped off with a hard chocolate shell. New York is known for these cookies and they are hard to find elsewhere in the country. As most of you know, I have relocated down south to Memphis, TN for the time being and for the life of me, I can't find any rainbow cookies. My problem was solved when I decided to make them from scratch.
I had heard that the act of making rainbow cookies isn't so much difficult as it is time consuming--and I heard correctly. You need a solid 2 days to make these cookies between the chilling, the sandwiching, etc and let me tell you, it is worth every second. The cake layers are super easy to make, requiring almond paste, amongst other basic cake ingredients. The batter is separated into three separate bowls, each being colored red, green, and one left plain white.
In my case, apricot jam is heated and strained and then spread between each layer. A baking pan is used to weight the layers overnight and then the chocolate layer is spread on the top and the bottom to finish off the cookies. After reading many reviews, I froze the completed, unsliced cookies for several hours before slicing them with a chef's knife dipped in hot water. This method worked perfectly and none of the chocolate cracked on top. I cut them into thin slivers which produced several dozen. You can choose to cut them into 1 inch squares as well, however, traditionally these cookies are served in thin rectangles.

I encourage you all to try your hand at this recipe at least once in your lifetime! It's not as difficult as it seems and if you have the time to spare, go for it! Next time I think I will go with raspberry and apricot jam in between the layers.

Check out smitten kitchen's recipe for these cookies found here.

REESES PEANUT BUTTER CUP CHEESECAKE

Wow, I've been making a ton of cheesecakes lately. There's nothing like digging your fork into a cold, creamy cheesecake with a crunchy crust. It's official, cheesecake is by far my most favorite dessert. I love to make them and I love eating them even more!

My boyfriends brother celebrated a birthday a few weeks ago and rather than baking your traditional classic birthday cake, I went with a Reeses peanut butter birthday cheesecake. This cheesecake was unreal. The peanut butter flavor wasn't overly strong and the Oreo cookie crust made for a perfect cheesecake foundation. The chocolate ganache layer on top really put this cheesecake over the edge as my most favorite cheesecake, to date.
This recipe fills is designed to fill a 10 inch springform pan, however, I only had a 9 inch so I had some extra batter leftover which I used to make mini peanut butter cup cheesecakes. Since my boyfriends family are die-hard Tennessee Volunteer fans, I stuck these cute little Vols picks in each mini. They were a huge hit.

Please note that you should plan a day ahead when making this cheesecake. It requires a lot of chilling time and I always find that leaving a cheesecake to chill in the fridge overnight produces the best results.

For The Crust

For The Filling

For The Topping

5 ounces milk chocolate chips
1/4 c. sour cream
  1. Please Note****Plan ahead--cheesecake needs to chill for at least 4 hours.
  2. To Make The Crust:.
  3. Combine crushed Oreo cookies and peanuts that have been ground in a food processor with the melted butter.
  4. Pat the crust mixture onto bottom and sides of a 10-inch springform pan.
  5. To Make The Filling:.
  6. Beat cream cheese in bowl of electric mixer until smooth.
  7. Add eggs, one at a time, beating well after each addition.
  8. Add sugar, peanut butter and cream; mix until smooth.
  9. Stir in vanilla, then fold in peanut butter cup pieces with a rubber spatula.
  10. Pour filling into prepared crust.
  11. Place springform pan into a larger baking pan.
  12. Pour hot water into the larger pan so that the water comes 1 inch up the sides of the springform pan.
  13. Bake at 275°F 1-1/2 hours, or until firm and lightly browned.'
  14. Remove from oven and allow to cool on a wire rack for one hour
  15. you may run a knife along the edge of the cake to loosen it from the pan somewhat.
  16. Refrigerate for at least 4 hours (overnight is your best bet)
  17. For The Topping:.
  18. In a saucepan over low heat, melt the chocolate and sour cream, stirring constantly. Spread over cheesecake and return it to the refrigerator to set up.